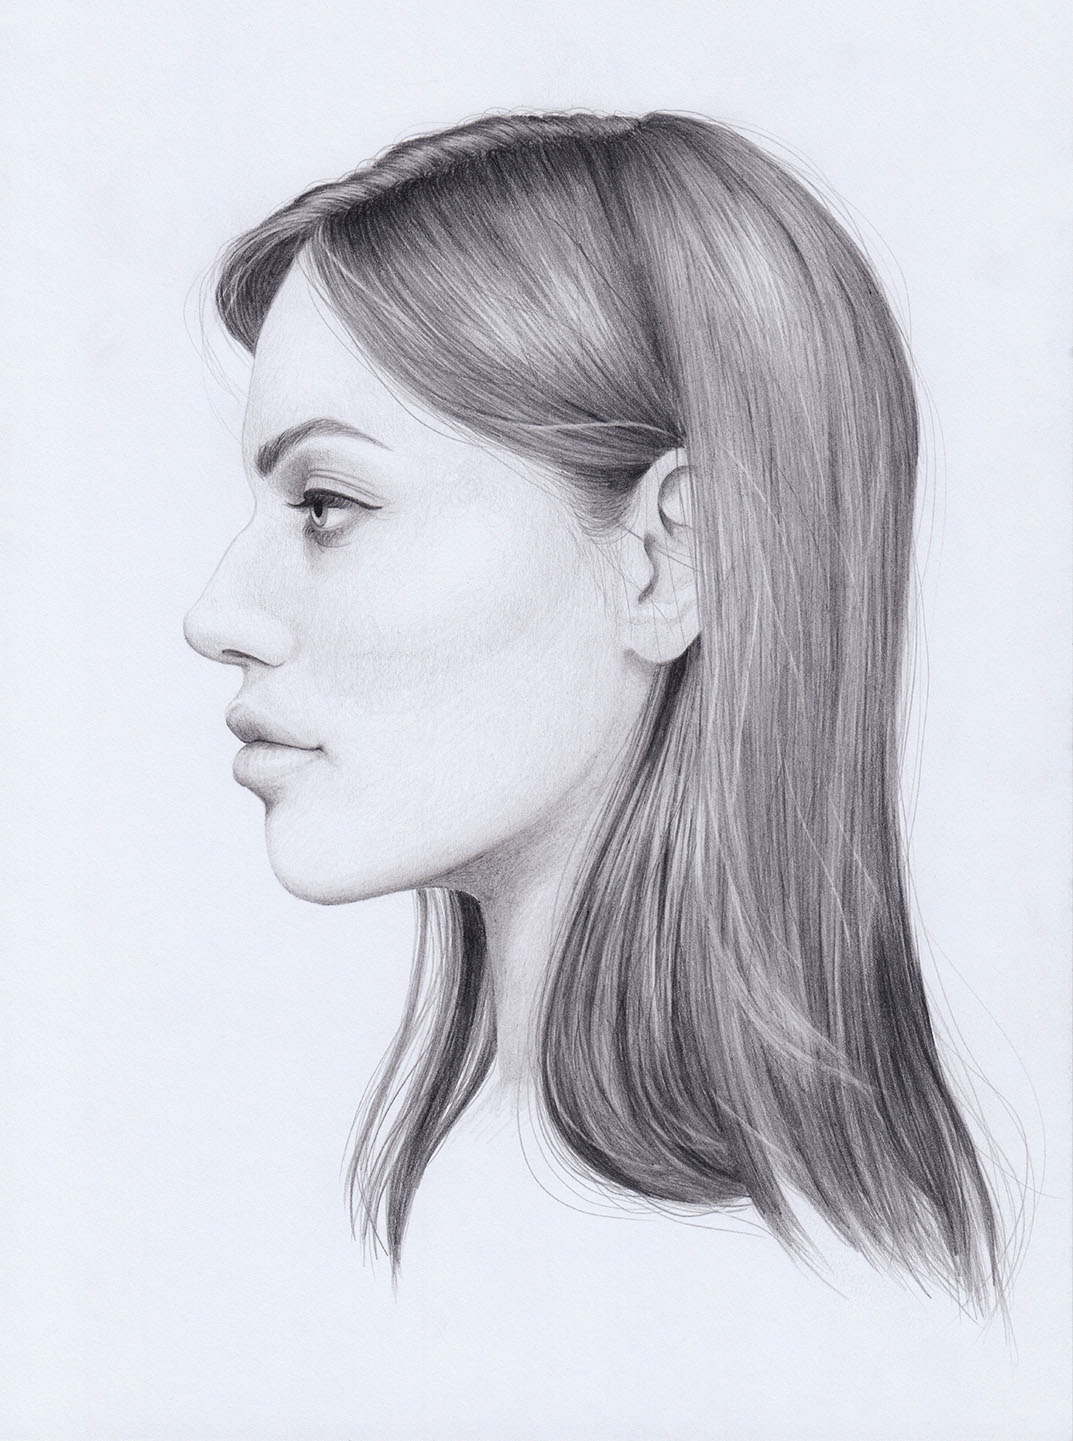
Drawing the Basic Structure of a Side Profile
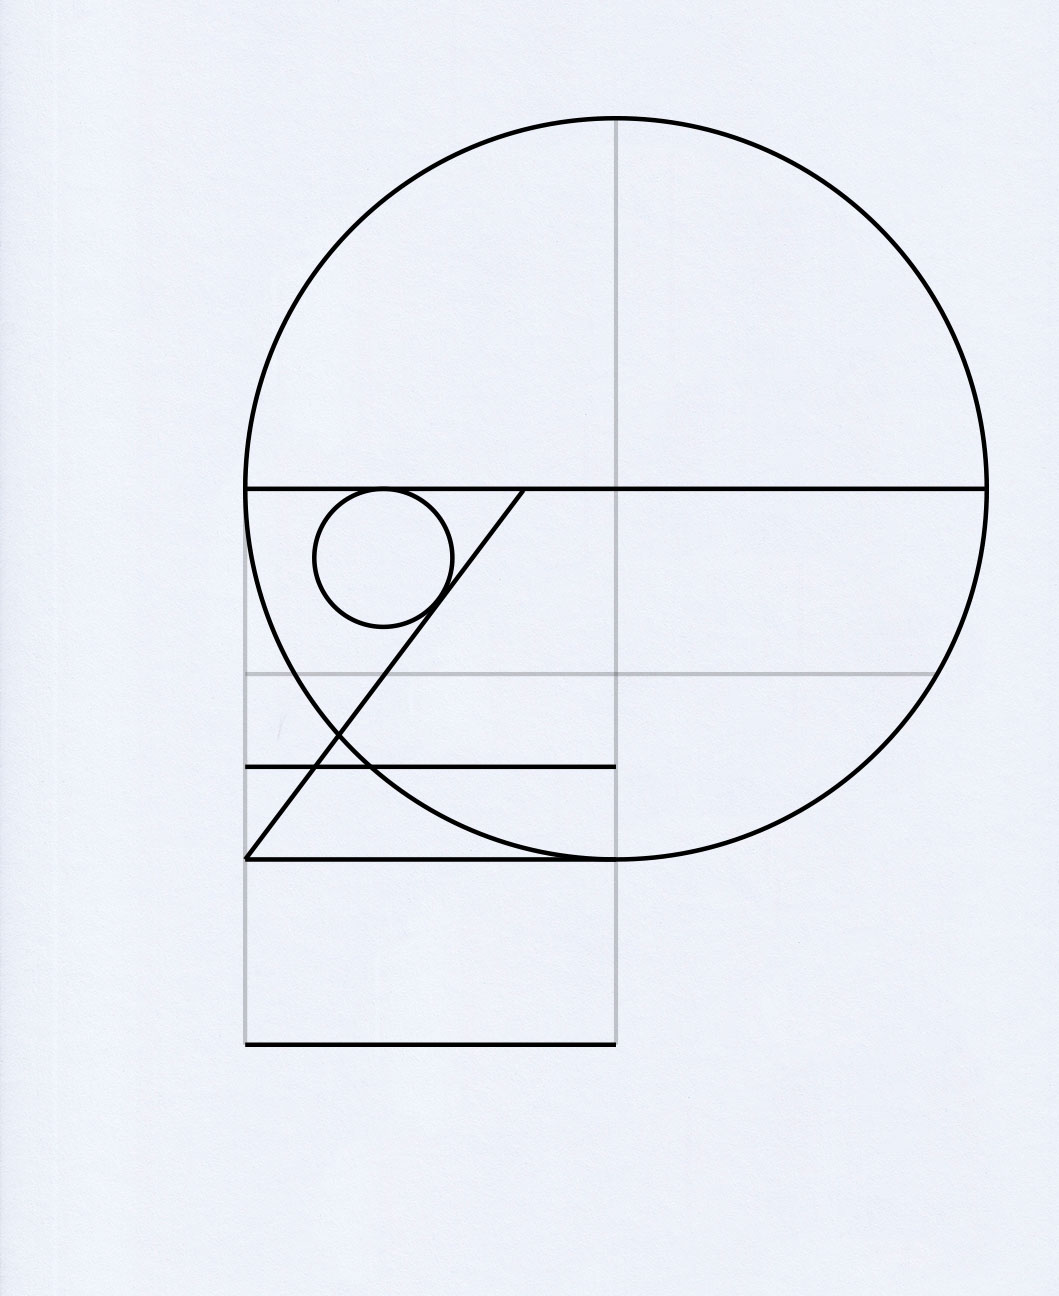
This tutorial follows up on the basics of the How to Draw a Head tutorial. To do this, we need to start with some guidelines and circles that help us get the proportions right. If you are unfamiliar with it, I recommend reading the other tutorial first.
The setup for a side profile is the same as the one we use for a front head. We only need the guides for one-half of the face and move the large circle by one-half. With this setup, we can draw a detailed sketch in the next step.
For beginners, I recommend starting with this setup of guidelines and circles. With practice, you will get better at drawing a side profile without them.
Drawing a Sketch of a Side Profile
Let’s take another look at our setup. It is important that we do not draw the nose, lips, and chin all exactly on top of the vertical line. We should only use it for orientation.
The tip and bridge of the nose should cross the line. You can draw the root of the nose in front of, on top of, or behind the line, depending on the shape of the nose.
For the lips, it depends on how full they are and where the lower jaw (so also the chin) is located. For an underbite or prominent chin, you would draw the chin closer to the vertical line.
For the position of the corner of the mouth, you can use the pupil as a guide. In fact, the corner of the mouth should be right below the pupil.
To draw the eye, only the front half of the small circle is relevant for us. We ignore the back half of the sketch. Draw the upper and lower eyelids so that they form a kind of arrow. But make sure the corner is slightly curved. Draw the iris next to the edge of the circle.
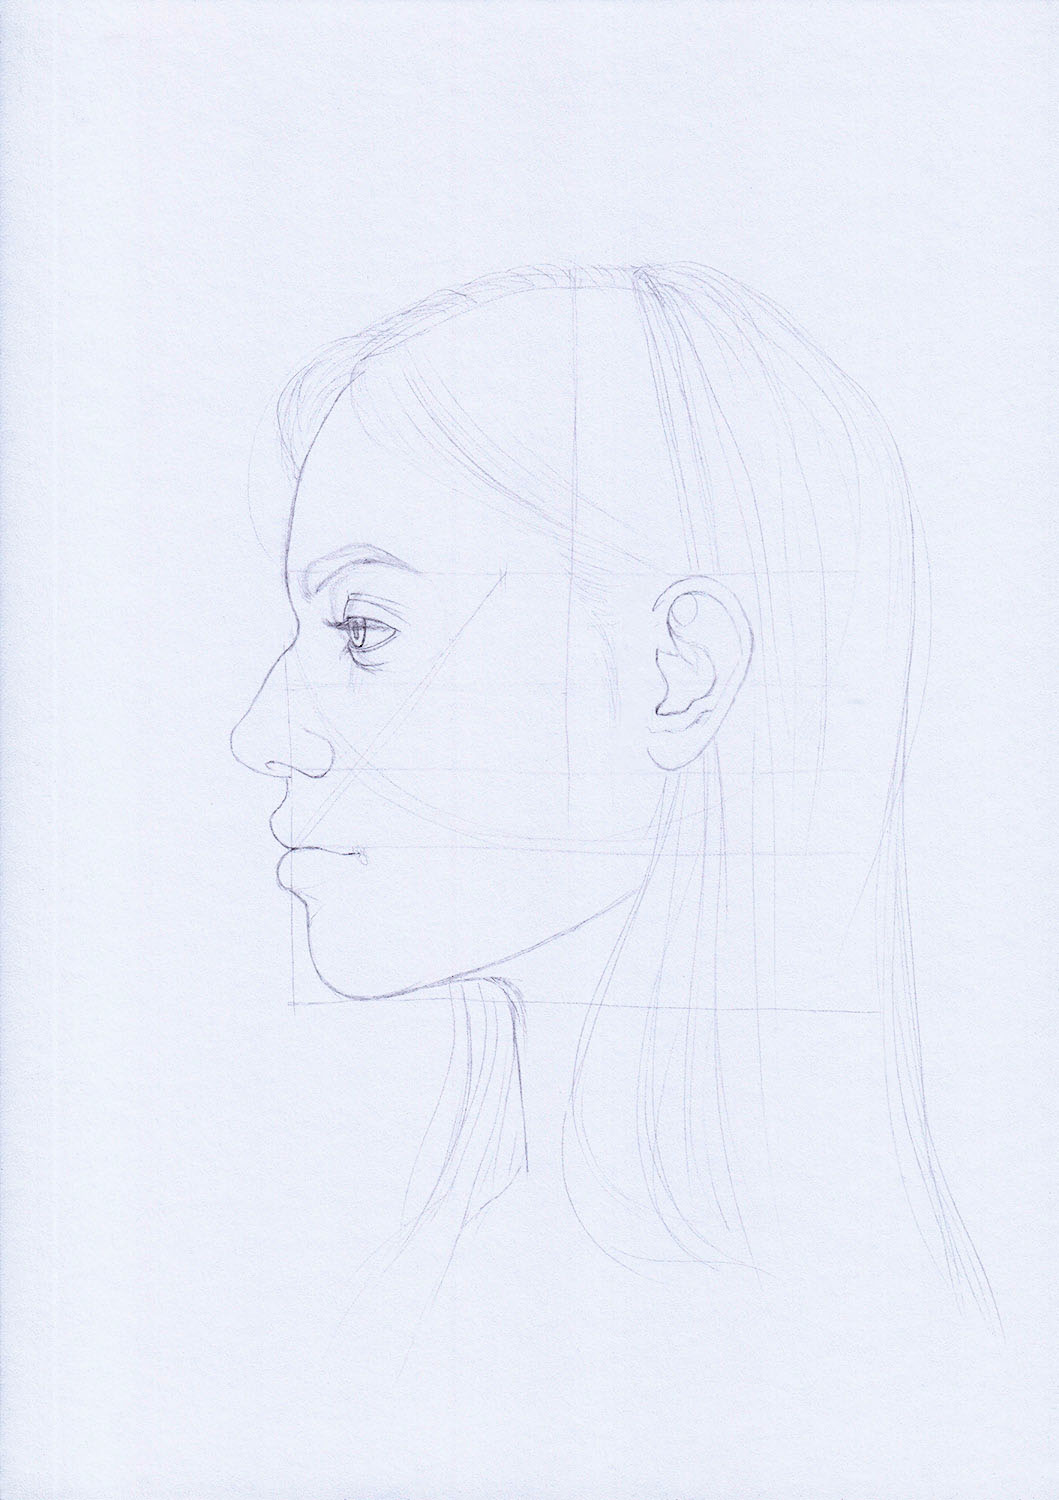
Once you are done with the eye, it is easier to find the position of the eyebrow. The eyebrow should be very close to the edge of the forehead and run in a gentle arc above the eye. The highest point should be a little bit behind the iris. These are not fixed rules. Depending on the shape of the eyebrows (short, straight, long, etc.) small deviations are necessary. It is best to try out different ones.
For the ear, make sure that we place it a bit behind the center line that divides the circle. If it sit exactly at the center line, it would be much too far forward in the face.
Drawing a Side Profile
Based on our detailed sketch, we can now draw the side profile. For my drawing I use pencils. But of course, you can also use other materials like colored pencils or watercolors.
Drawing an Eye
When you draw the eyelashes, make sure they are all aligned in the direction of the side profile. Even the eyelashes near the outer corner of the eye point there, though you should soften the arc here as well.
Even if we don’t see the area around the inner corner of the eye in a side profile, don’t forget to draw a few individual lashes of the hidden area.
Depending on the eye, there may be several prominent creases on the upper eyelid or none at all. Additionally, you’ll find fine lines on each eye, such as smile lines.
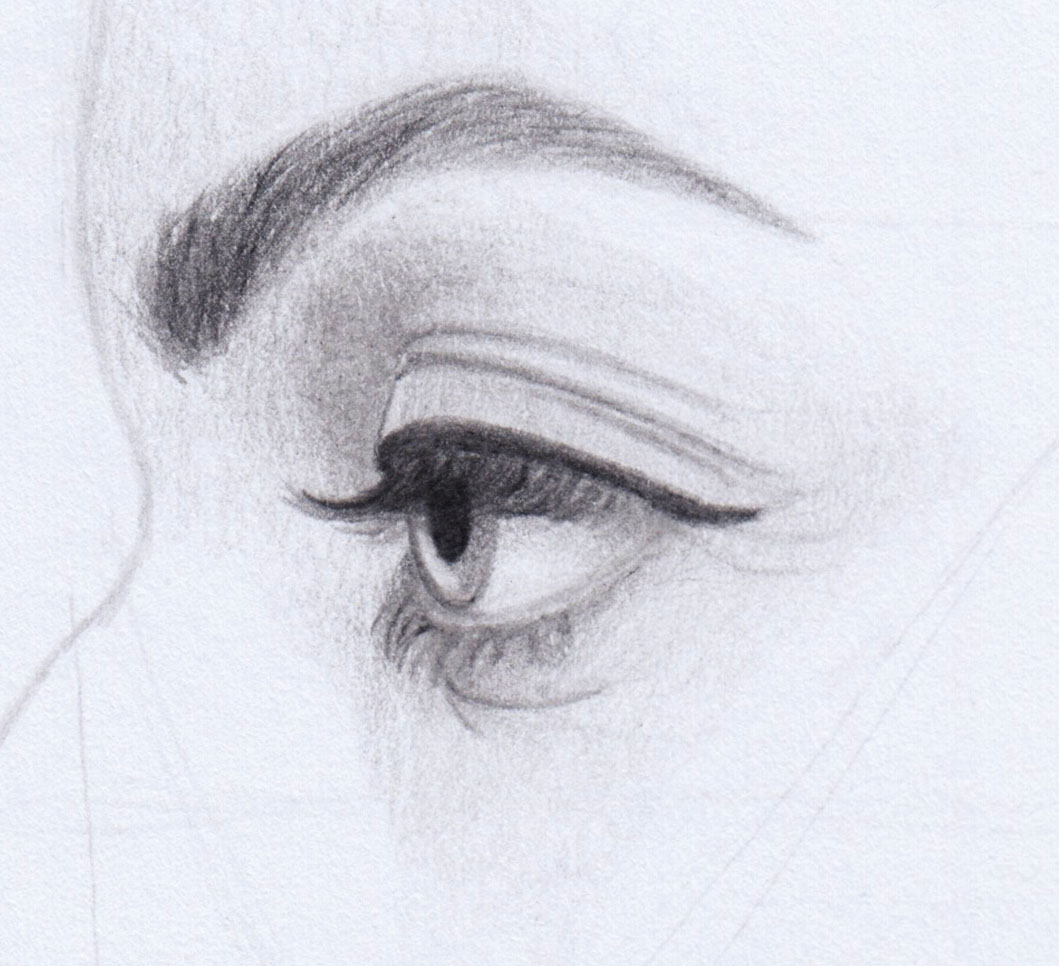
Add many individual hairs to the eyebrows, making sure to follow the direction of growth. Close to the forehead, the direction of growth leads away from the eye, but above the eye, the hairs form a uniform arc.
Drawing a Nose
Drawing a nose from the side is much easier than drawing a nose from the front.
It’s best to model the nostril of the nose with soft shadows. You can add darker shadows to the area underneath, with the darkest part being the nostril.
You can leave one area on the tip of the nose untouched. This creates a light reflex, but it is better seen with darker skin. Add shadows to the lower part of the tip of the nose like to those below the nostril.
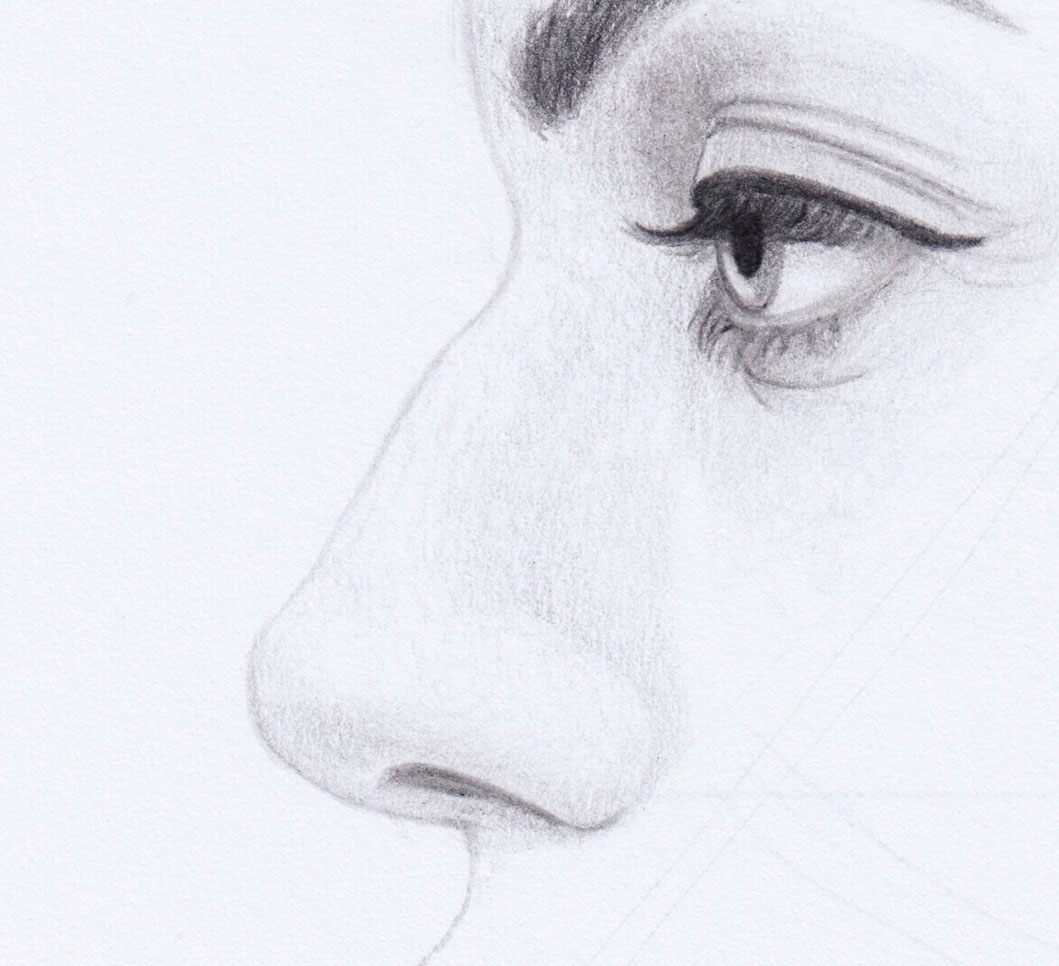
The very soft shadows along the bridge of the nose should blend into the forehead and eye area.
Drawing a Mouth
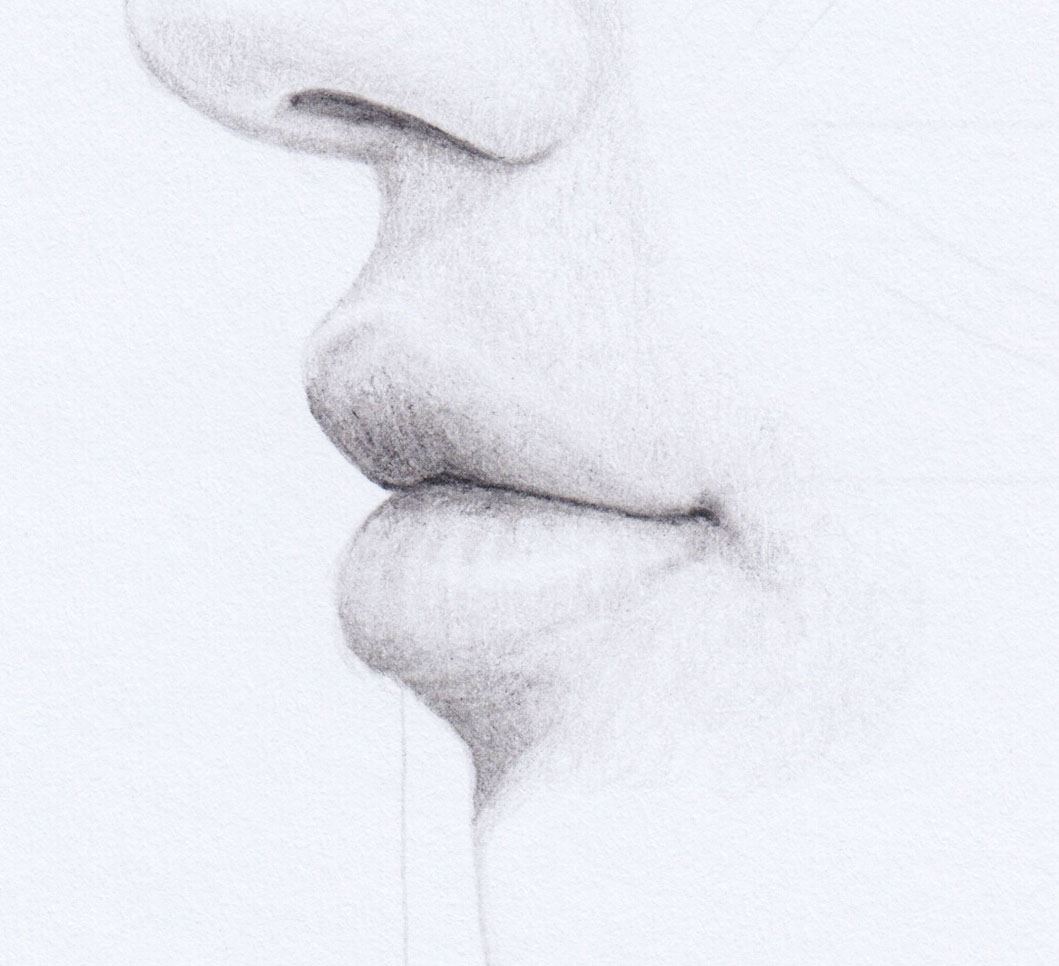
When drawing a mouth from the side, there are similar things to consider as when drawing a mouth from the front. Work on the shadows to get a better idea of their intensity. We don’t want to start too dark right away, as correction can be difficult.
Once you are done with the lips, connect the area above the upper lip to that of the nose by drawing soft shadows.
Once these are done, it is advisable to take another look at the nose. Once the mouth is finished, it’s easier to assess whether the nose might need stronger shadows.
Drawing Skin
Once the eye, nose, and mouth are done, we can continue with the rest of the skin.
Take your time for this step. Shadows are especially necessary in areas like the cheek or the lower jaw. But be careful not to draw them too strong or too weak.
The wrinkles and lines on the face can also have an important impact on your drawing. Make sure you capture the age and mood of the person you are drawing.
It is usually better to reassess the shadows on the skin one last time after the hair is done. Then, you can correct them if necessary.

Drawing Hair
The only thing missing now is the hair. Depending on the hairstyle, pay attention to whether the parting is visible or not, how the individual strands fall, etc.
It could be that after the hair, the rest of the face looks flat and washed out. In this case, you haven’t done anything wrong. Your drawing is only missing some stronger shadows on the face that you can touch up.
