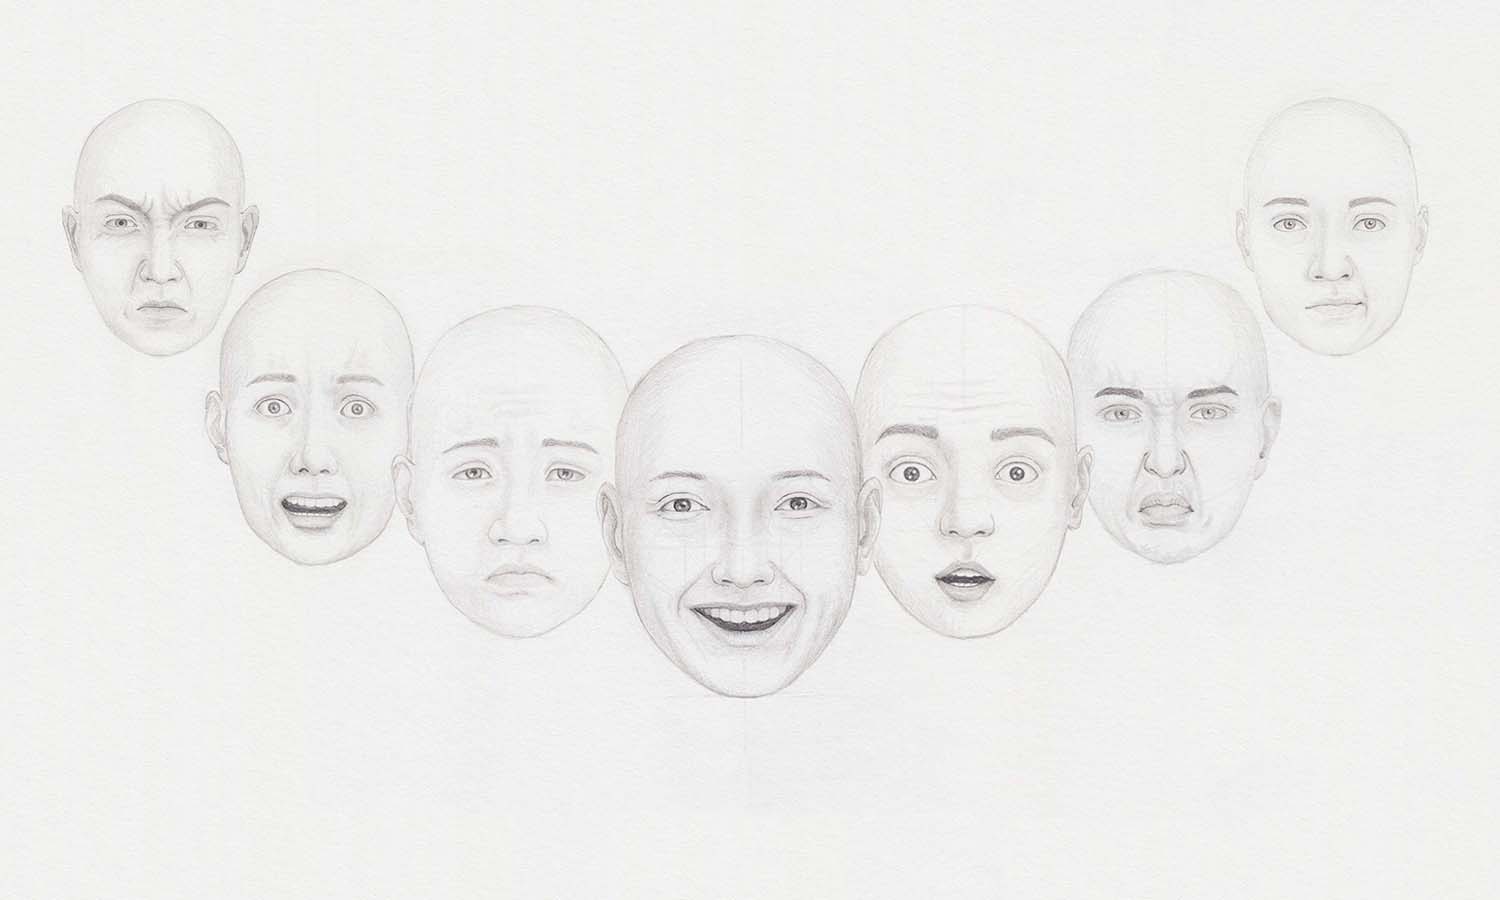
How to Draw a Face: Facial Expressions
Learn to draw the 7 universal emotions and their facial expressions
When you’re drawing a face, it’s important to be able to capture the person’s emotions and expressions. This can be a bit tricky, but with a little practice, you’ll be able to draw any expression you want. In this article, I will show you how to draw different facial expressions, so you can create realistic portraits that look like your subject is actually feeling something. Let’s get started!
If you want to draw a face that expresses an emotion, it is very helpful to already be able to draw a head confidently. To follow this article, you don’t have to be a professional artist, but I would recommend beginners familiarize themselves with the anatomical basics of a head beforehand.
Basics of a Face
There are various definitions out there of what belongs to a face, but for our drawing purposes, we can limit ourselves to eyes, nose, mouth, and forehead.
In our how to draw a head tutorial, we drew a head with an expressionless face together, because we focused primarily on the proportions.
Emotions change some parts of the face more and others less. For example, the position of the nose or eyes may not change, but the eyebrows and mouth may. Therefore, you do not have to follow all guidelines from the head drawing tutorial here.
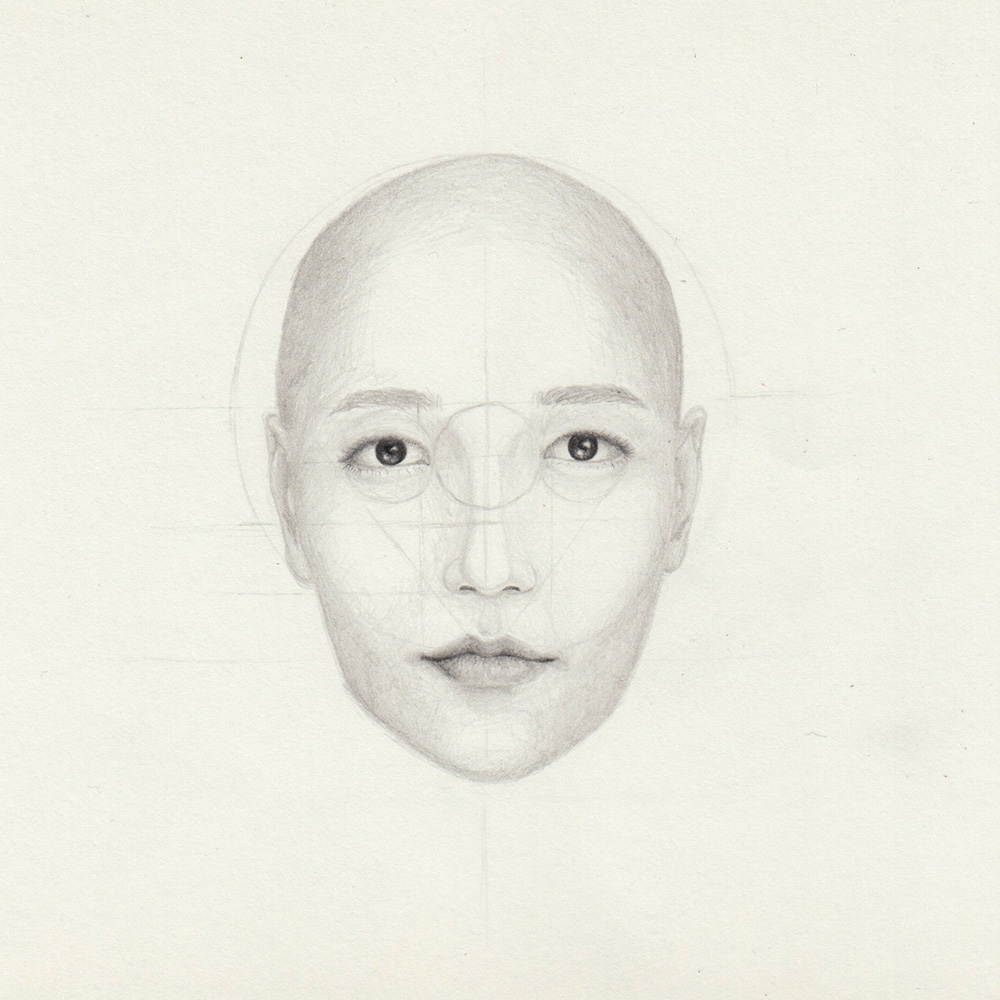
Emotions: Drawing Facial Expressions
In this article, we will go through the 7 universal emotions according to Paul Ekman, a US anthropologist, and psychologist. You will find descriptions of the individual features and changes in the face of each emotion, and descriptions of how to draw this.
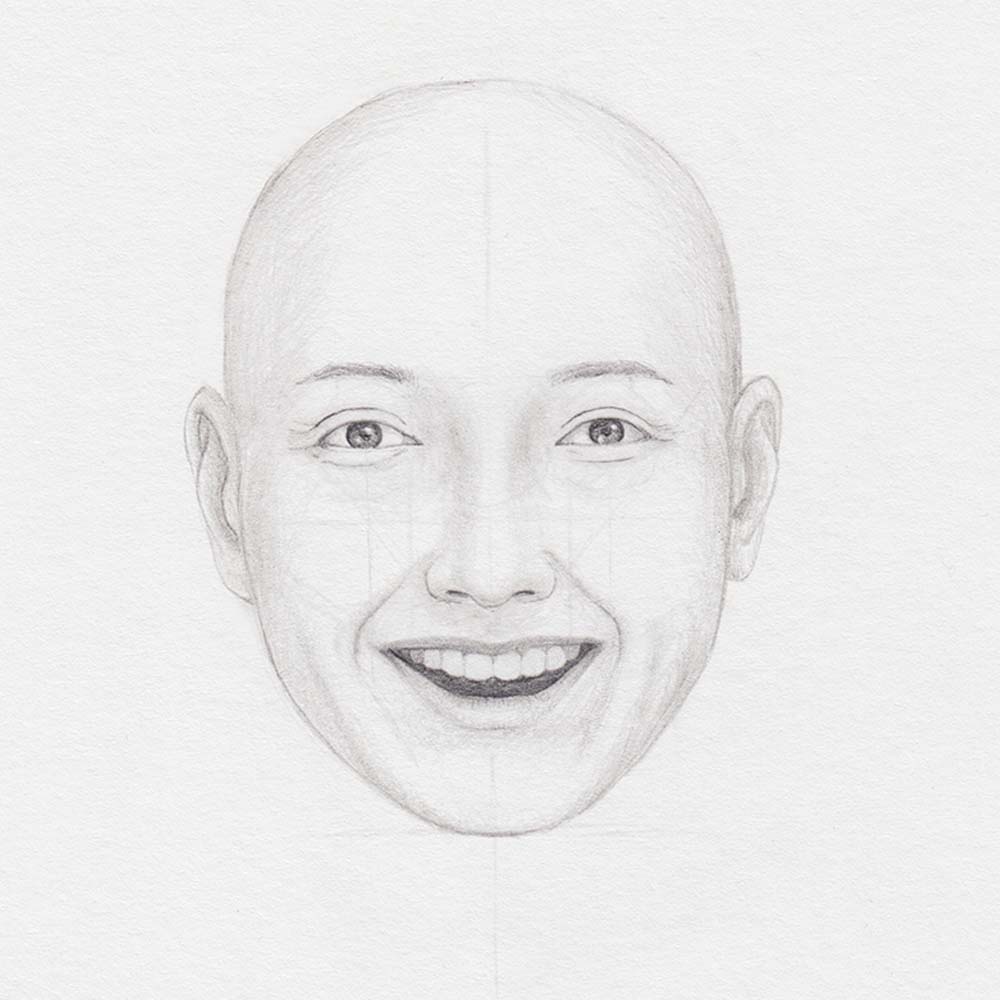
Enjoyment: Drawing a Happy Face
When there is enjoyment, the corners of the mouth not only lift a little, but the mouth generally becomes wider. A good clue when drawing the position of the corners of the mouth is the pupils because the corners of the mouth are below both an open and a closed joyful mouth.
In addition, smile lines form that start next to the nostrils and extend around the corners of the mouth. You can continue these lines with a very gentle shadow towards the chin and draw equally gentle shadows parallel next to them.
Other smile lines are located around the eyes. With a hard pencil, we can continue the outer lines of the eyelids curved upwards, almost as if we were drawing eyelashes. Another crease is under each of the lower eyelids. We should draw the lower eyelids themselves a little higher than we would on a resting face so that the edge of the iris is slightly hidden.
Surprise: Drawing a Surprised Face
With surprise, the mouth remains relaxed, whether it is slightly open or closed. So the shadows are the same as when we draw a regular mouth.
The eye area, on the other hand, changes more: the eyelids are wide open, but there are no additional wrinkles that we need to draw.
The eyebrows are raised in surprise, so draw them above the guidelines. Depending on how much the eyebrows are raised, there will be horizontal creases on the forehead. Draw these with a very hard pencil to not draw them too dark. With slight surprise, the forehead can also be wrinkle-free.

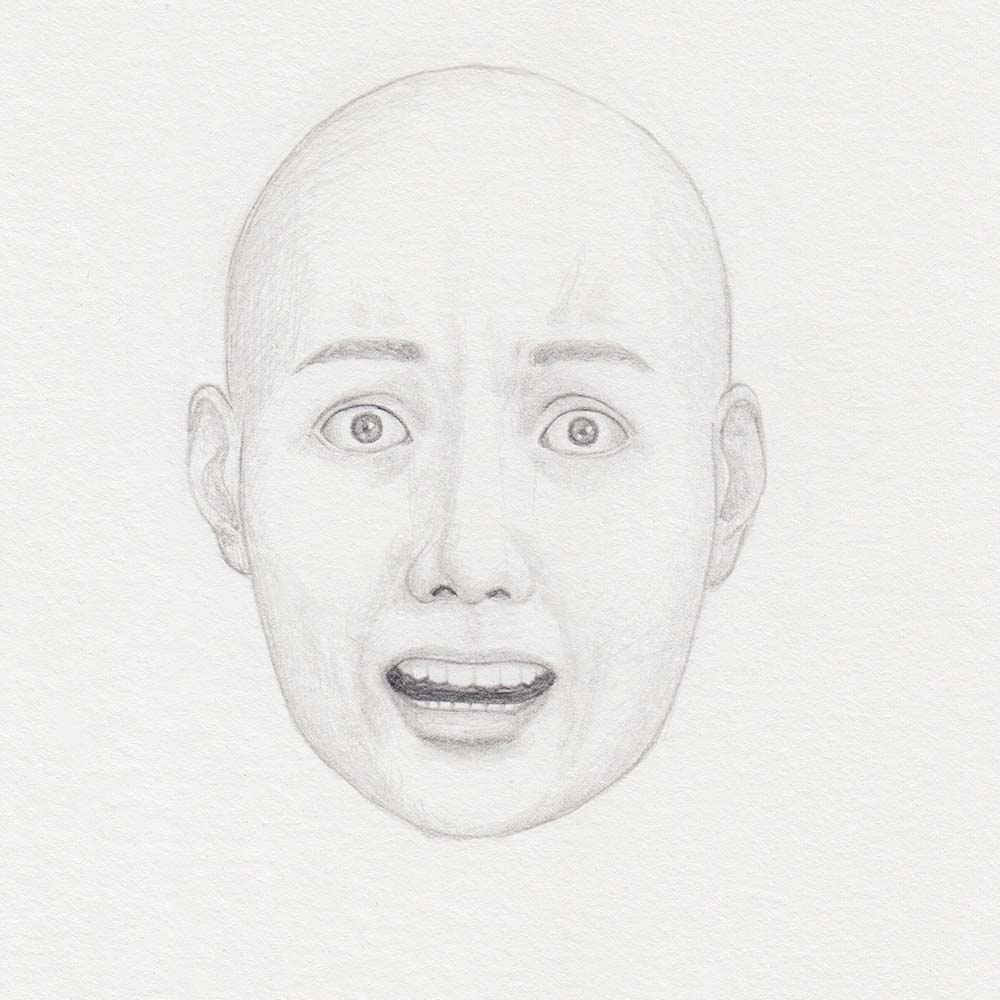
Fear: Drawing a Fearful Face
If you look at the features of fear only superficially (raised eyebrows, widened eyes, open mouth), it’s easy to confuse fear with surprise. Important features make the difference here.
In fear, the eyebrows are raised, but at the same time, they are pulled inward. This creates vertical creases between and arrow-shaped creases above the eyebrows, which you should draw very slightly. The eyebrow movement also allows you to draw the inner area of both upper eyelids a little higher than in a resting facial expression.
The mouth is open in fear, and the lips are tense in the process. The corners of the mouth go to the side, creating similar creases as in joy, but the corners of the mouth do not move up as in joy.
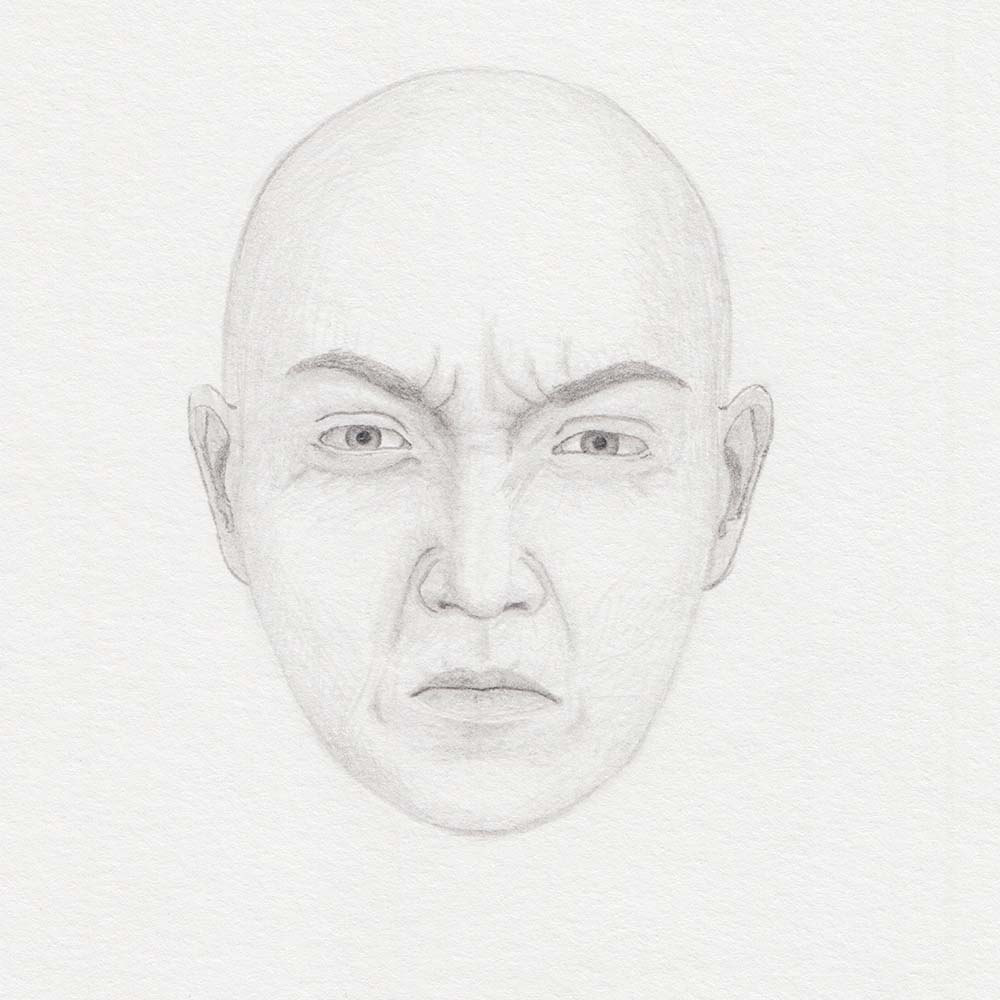
Anger: Drawing an Angry Face
In anger, the eyebrows are pulled down and closer to each other, creating wrinkles vertically between the eyebrows and horizontally on the root of the nose. You can draw these wrinkles a little more clearly, using an HB pencil.
The eyes are squinted, and especially the lower eyelid is strained and pulled upwards. This creates more wrinkles under the lower eyelid, but you should draw them a little lighter. You can also draw fine wrinkles starting from the inner corners of the eyes and running at about a 45° angle down to the bridge of the nose.
The mouth becomes tense when angry and pinched together, and the corners of the mouth move slightly downward. Wrinkles similar to those of enjoyment appear next to the corners of the mouth, but they are angled differently and lie below the corners of the mouth.
Disgust: Drawing a Disgusted looking Face
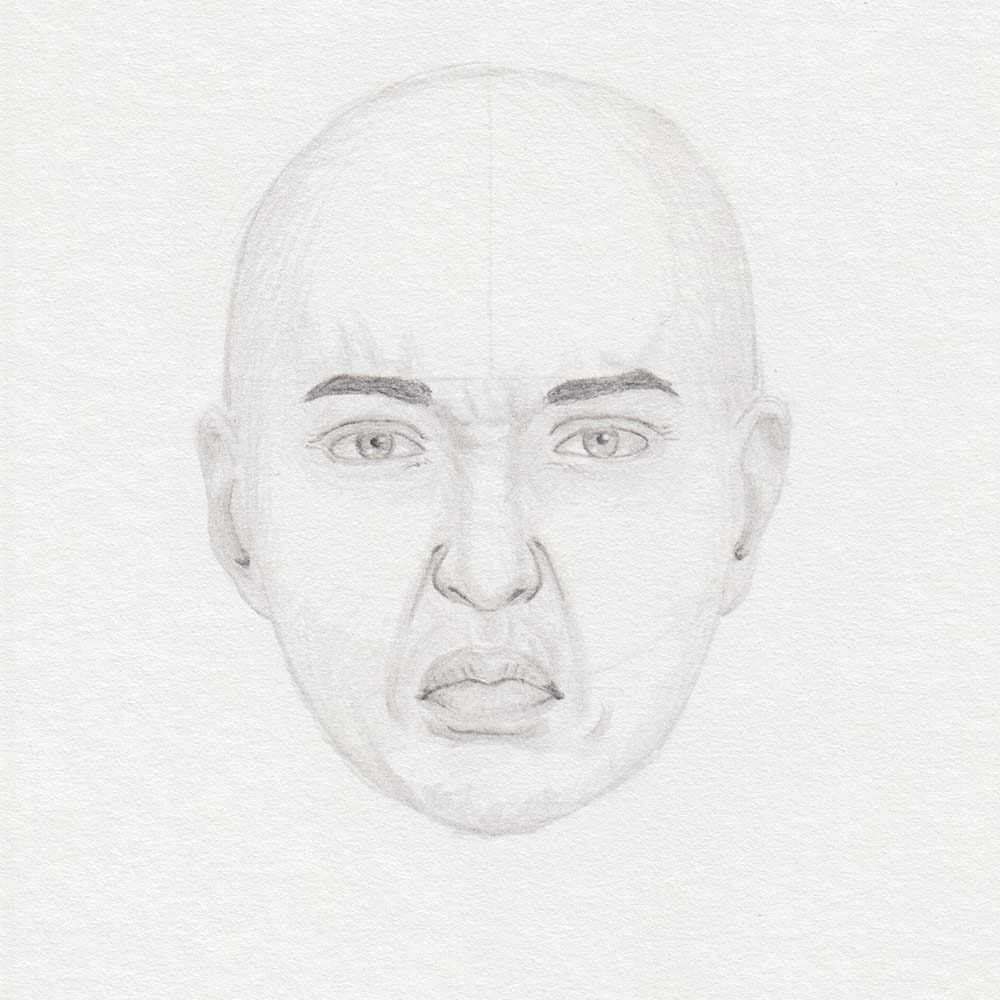
Very important when drawing disgust is the nose area, where the nostrils are pulled upwards, creating two wrinkles next to the nose. You should draw these wrinkles darker next to the nose in the upper area. They do run down to the corners of the mouth, but there they should be drawn much lighter.
Another characteristic of disgust is a raised upper lip, which looks like an upside-down U. Several short wrinkles appear above the upper lip and a dark crease appears below the lower lip. As with anger, the corners of the mouth point downward, causing the wrinkles to appear next to them.
The eyes are a bit squinted, creating wrinkles on the root of the nose and between the eyebrows, similar to anger as well. However, the eyebrows remain in a straight line and are not pulled down, which is a crucial difference from Anger.
Sadness: Drawing a Sad Face
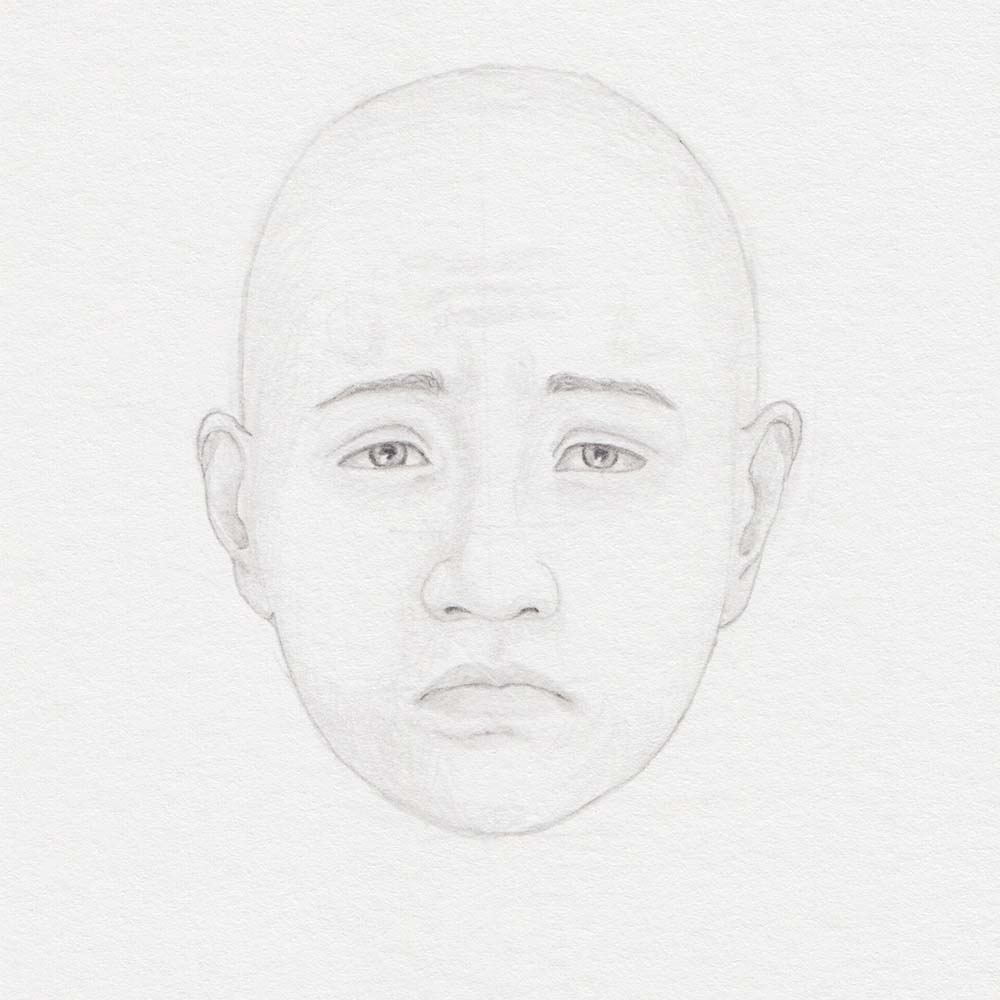
A sad face may seem relaxed at first glance because except for some parts of the face, it actually is resting without energy.
The eyebrows are only pulled together and up a little on the inside. It is not the entire eyebrow that is raised. The movement creates vertical creases between the two eyebrows and horizontal creases on the forehead, all of which you can draw brightly.
The movement of the eyebrows also affects the upper eyelids, which should also be drawn a little lifted on the inside.
The mouth is relatively relaxed, but the corners of the mouth point slightly downward. A slight crease appears under the lower lip, as the lower lip is usually tightened a tiny bit when sad. However, this is not always the case.
Contempt: Drawing Contemptuous looking Face
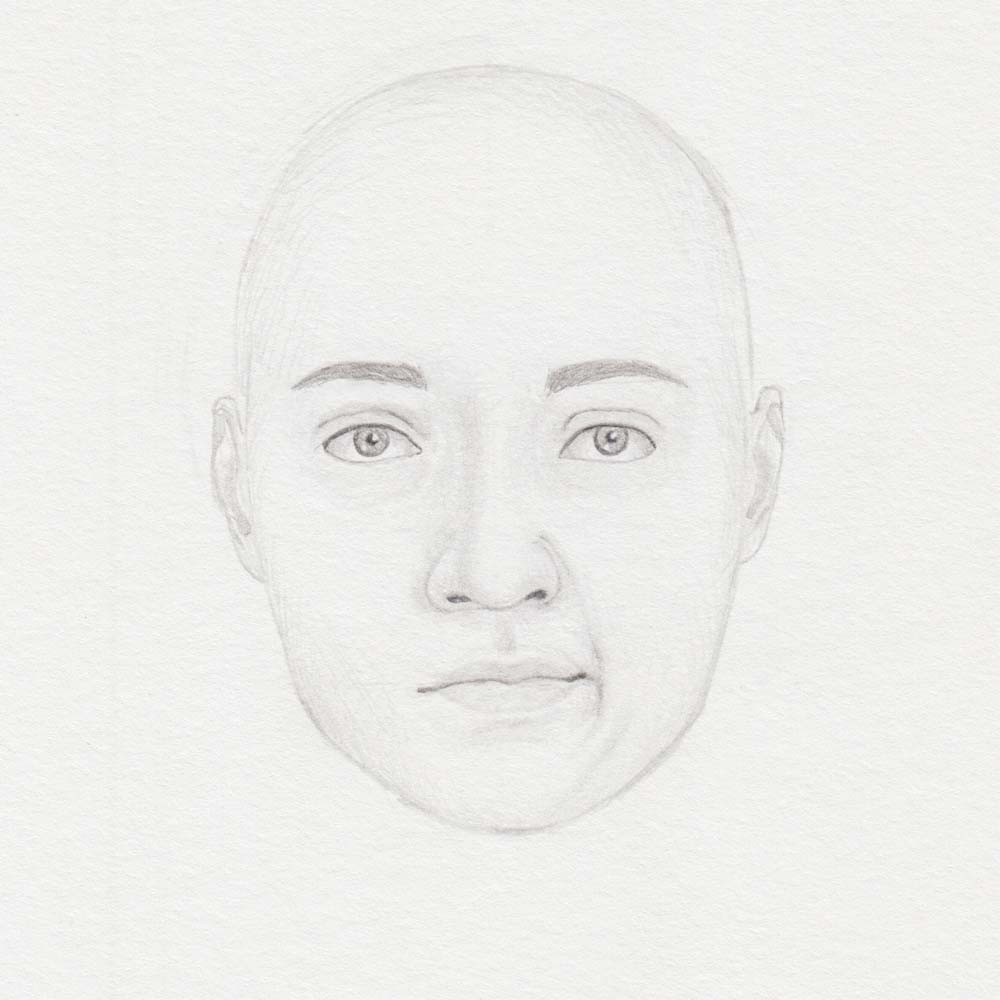
Contempt manifests itself, especially in the asymmetry of facial expression.
For the most part, you can draw the entire face in a relaxed state, except for the nose and mouth area on one side of the face. In contempt, one corner of the mouth is pulled up a little and to the side, shifting the center of the mouth to that side as well.
Add one wrinkle to one side of the nose. You can draw the exact same crease for this as we would for disgust.
Final Tips on Drawing Expressive Faces
Facial expressions are a form of non-verbal communication that all people understand, and we can make them our tools when painting and drawing. A portrait doesn’t always have to grin from ear to ear or shed tears the amount of a waterfall for us to portray an emotion in a drawing. Sometimes just drawing a micro-movement is enough. This combined with contrasts or colors will give our drawings or painting a whole new feel.
Similar Posts