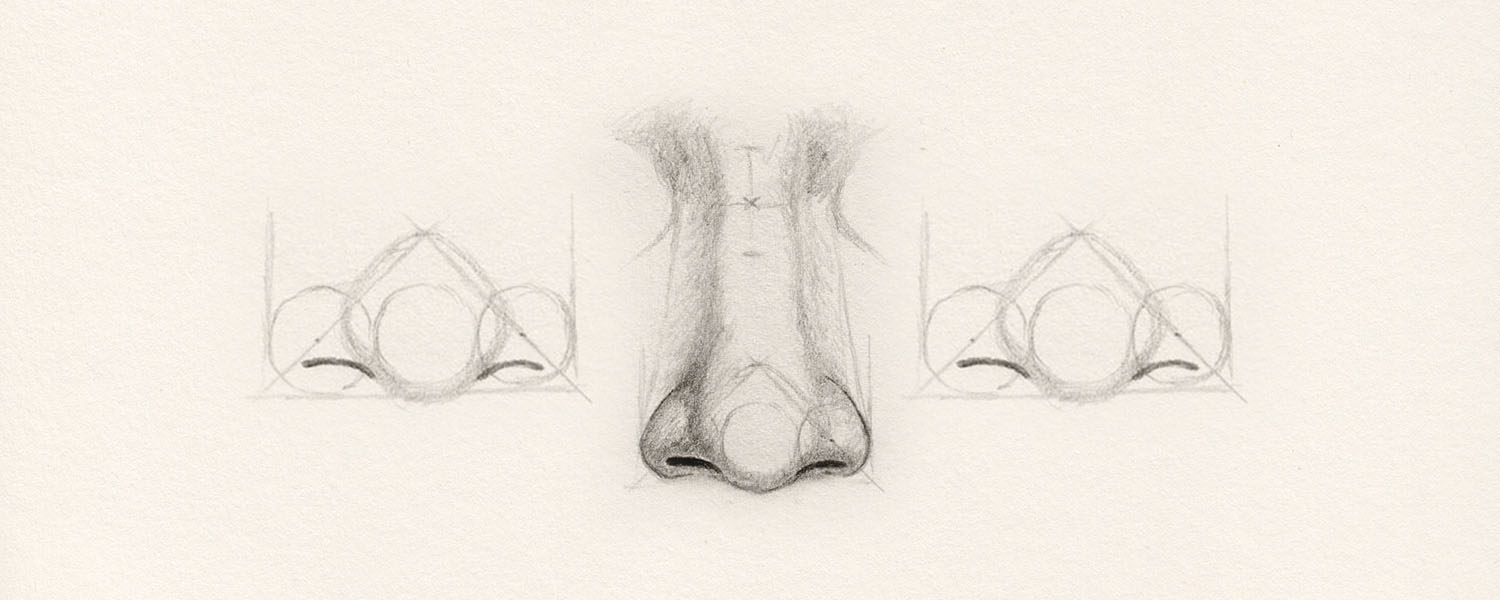
Everyone can draw a nose, you just need a few pointers to get started. In this tutorial, I will give you some tips on how to draw a nose that will look realistic. With a little practice, you’ll be able to draw noses that look just like the ones in your favorite pictures. So let’s get started!
Step 1: Guidelines for a Nose
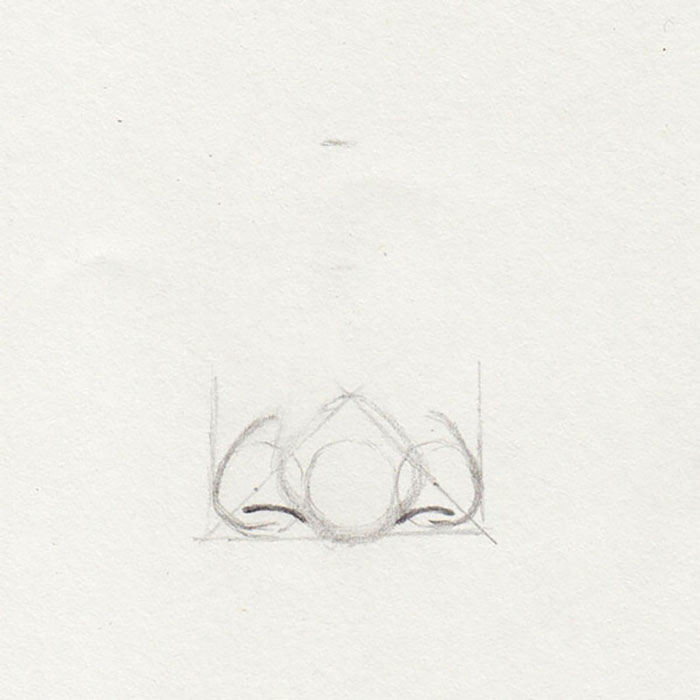
Start with guidelines that will help you draw the nostrils and nose tip later. To do this, you first need three circles of the same size next to each other.
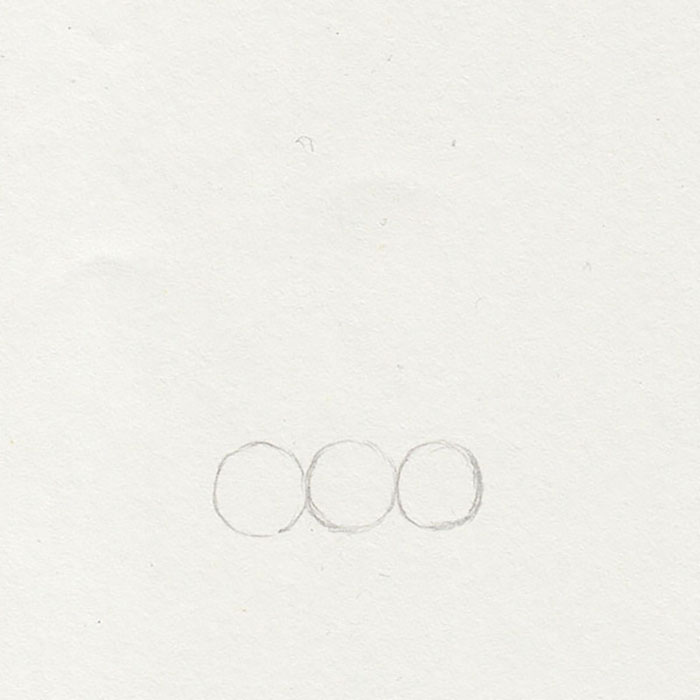
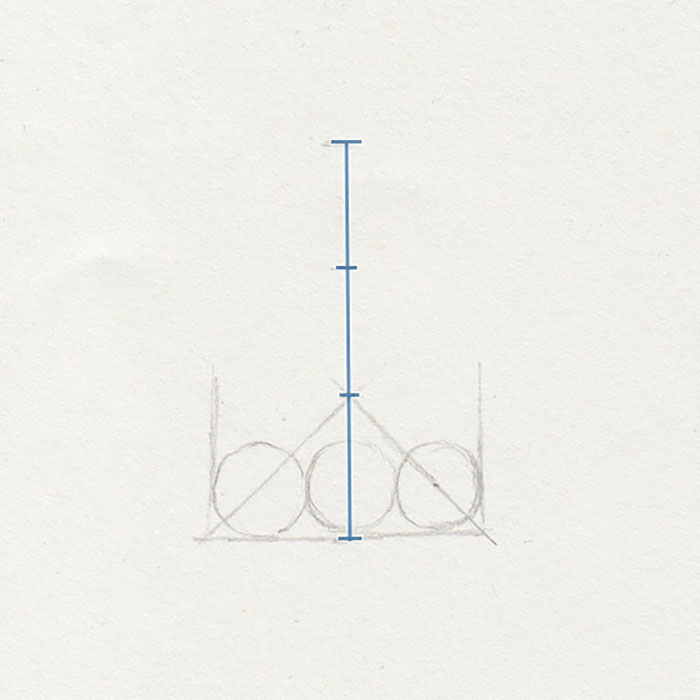
Now add a horizontal line below the circles and a vertical line to the left and right of each of them. Then mark the midpoints of the two outer circles and draw a line starting from the intersection of the vertical and horizontal lines and passing through the midpoint. These two lines should cross to form a triangle.

At this stage, you can already define the height of the nose bridge: Check the height of the triangle and draw a line three times this height starting from the horizontal line.
With these guidelines, you can now draw the actual nose.
The guidelines do not have to be perfectly symmetrical. My lines are also a bit crooked, but fortunately, even nature usually doesn’t draw perfect noses.
Step 2: Drawing the Nostrils and Tip of the Nose
Now you have three circles and three elements: two nostrils and a nose tip. Does each circle represent one element? It does not so be careful with the next steps.
Don’t be misled by the middle circle, because it has nothing to do with the tip of the nose. Focus first on the outer two because they help you draw the nostrils. The circle in the middle was just to put the two outer ones at the right distance from each other.
How Do You Draw the Nostrils?
I’ll put it this way: Try to draw the nostrils relatively freely now. I could perhaps break this down further into small geometric parts, but in my opinion, this would be less helpful and would only confuse.
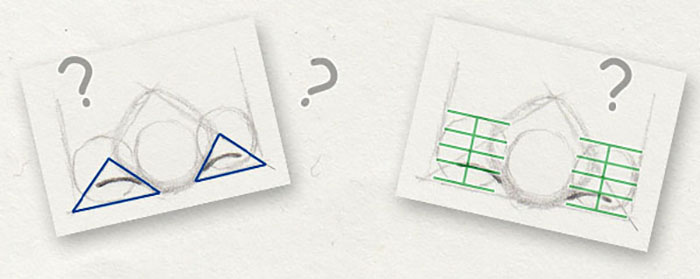
The nostrils can be in many different shapes and are influenced by the shape of the tip of the nose.
If the tip of the nose curves downward, the nostrils also curve downward. If the tip of the nose curves upward, the nostrils also curve upward. In a nose where the tip is fairly central, the nostrils can be drawn are relatively straight and horizontal.

It can also be helpful to determine the shape of the tip of the nose in advance to better plan its structure of it. For example, a crooked nose may look U-shaped.

For the nose tip in my drawing, I choose the shape of a rounded diamond. I continue with only very slightly downward curved nostrils. It doesn’t matter what shape you choose: Since the outer circles roughly represent the nostrils, draw the nostrils in the lower area of the two outer circles.

It would be too easy if there was only one way to draw nostrils. Again, you’re spoiled for choice. If you want to draw a round nose tip, round nostrils make sense; likewise, striking nostrils seem to go well with a crooked nose.
However, the outer edges of the nostrils should not cross the outer edges of the circles.
Draw the Bridge of the Nose
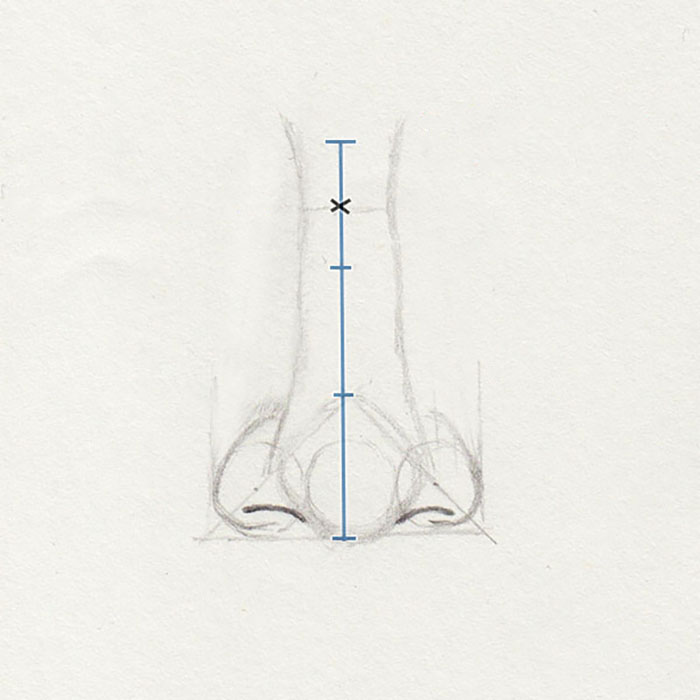
Let’s jump back to the three triangle heights from a few steps earlier: Divide the upper section right in the middle. This point marks the beginning of the nose and is at the same height as the eyes. Above it is the forehead.
Depending on your preference, you can draw the bridge of the nose straight up, let it run slightly inward, or something else. As you can see, the nose in my example is slightly wider at the beginning. The upper lines should diverge in an arc, because that’s where the transition to the forehead is, and the lines would end in the eyebrows if drawing a full face.
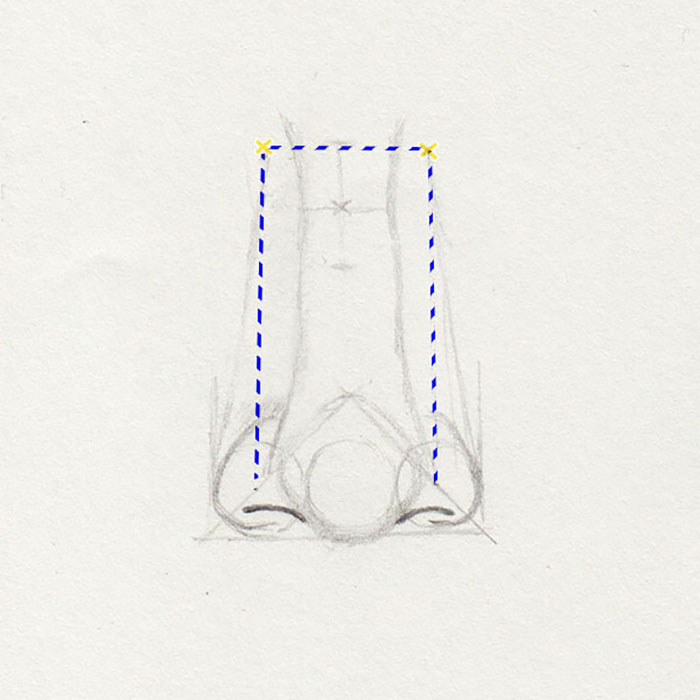
Now you need two additional new points. They are at the height of the uppermost markings and are parallel to the centers of the outer circles we used for drawing the nostrils.
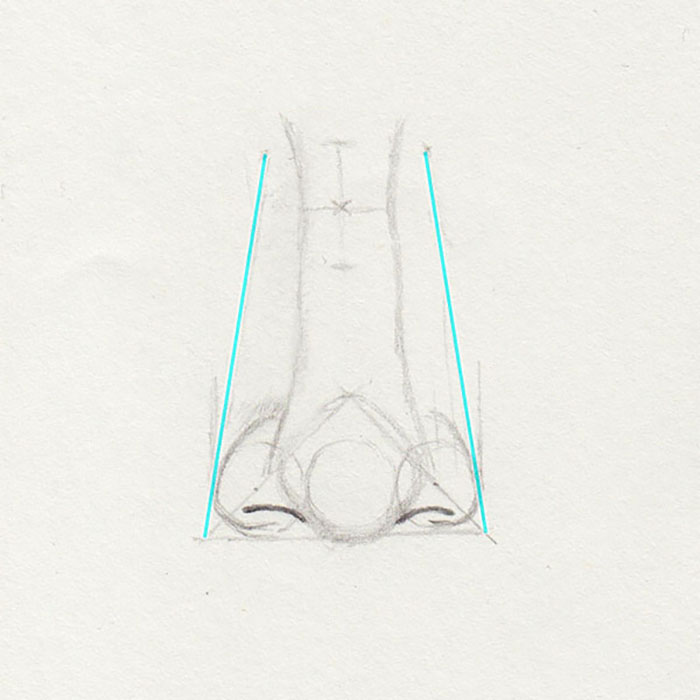
Starting at the upper points, draw two lines that touch the edges of the nostrils. This is the area where the bridge of the nose casts shadows. It will help you later to make the bridge of the nose look three-dimensional.
Step 4: Shading and Sculpting
To make the bridge of the nose appear three-dimensional, draw shadows to the sides of the lines. However, do not exceed the previously marked area. If the bridge of the nose is flat, the shadows should be light. But the more the nose bridge protrudes, the darker they should be drawn.
On the lower area of the tip of the nose and the nostrils, there are also stronger or weaker shadows, depending on the depth. In the example drawing, you can see the three types of noses again, where you can see the differences in shading.
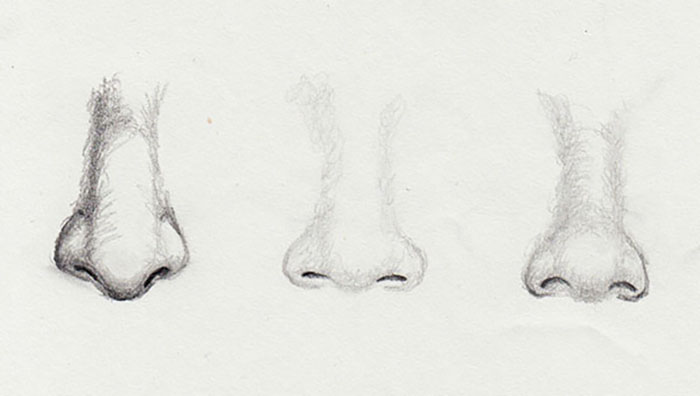
The transition between the beginning of the nose, forehead, and eye area also needs a shadow that is lighter or darker according to the depth.

Practice Drawing Noses for Perfect Results
I’ve drawn many noses in my life, but during the preparations for this tutorial, I drew what felt like 100 additional noses. It takes varying amounts of time to get the hang of it. Don’t get discouraged if your first few attempts fail. You will learn with each nose you draw.
It is best to combine this exercise with a reference, so you can apply all the steps to a real nose. You can use a photo of a nose or a small mirror and look at your own, which I would recommend over a photograph as you can inspect it from all angles and study it better.
When mastered drawing noses one day, you won’t need any guidelines at all, because then your hand and eye will be trained enough.
Similar Posts