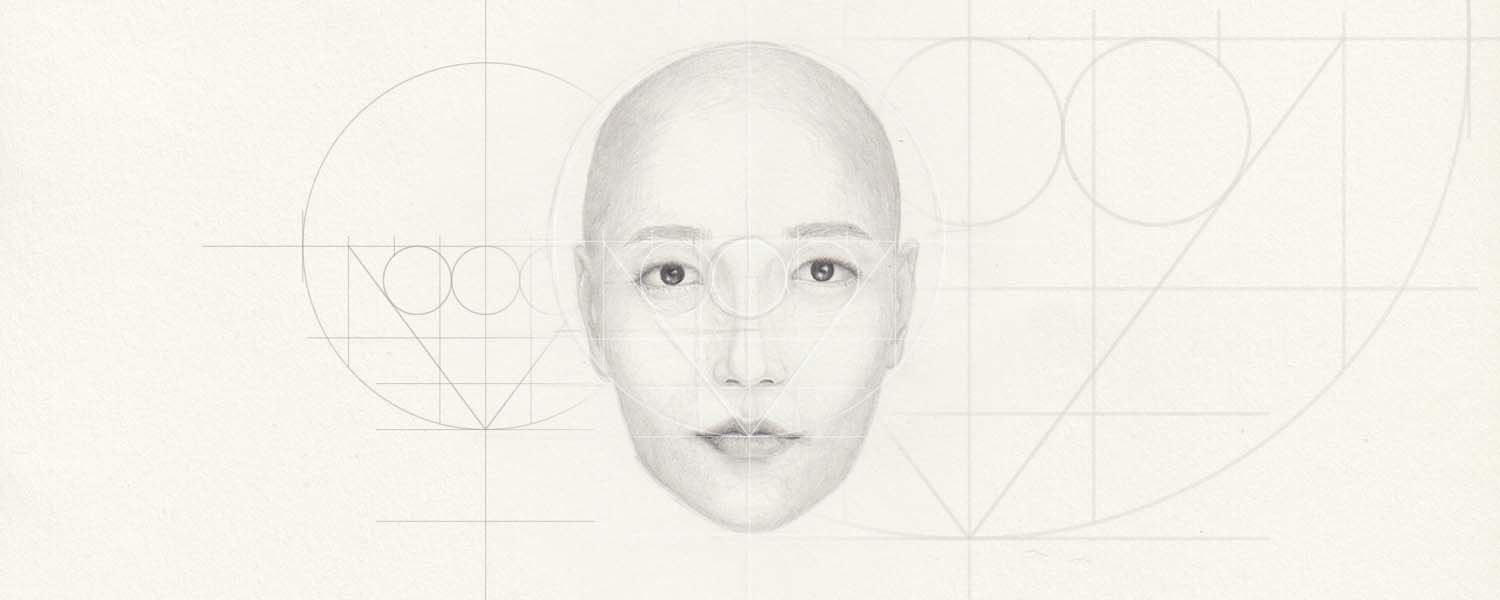
In this tutorial, I will be walking you through the process of how to draw a head step by step. This is an important skill for artists and hobbyists of all levels, as the human head is one of the most complex and interesting objects to depict. With a little bit of practice, you’ll be able to draw heads that look realistic and lifelike. So get out your pencils and paper, and let’s get started!
Warning: The first part of this tutorial can be a bit tiring, as you are going to draw a bunch of lines. But trust the process, in the second half it will become way more fun!
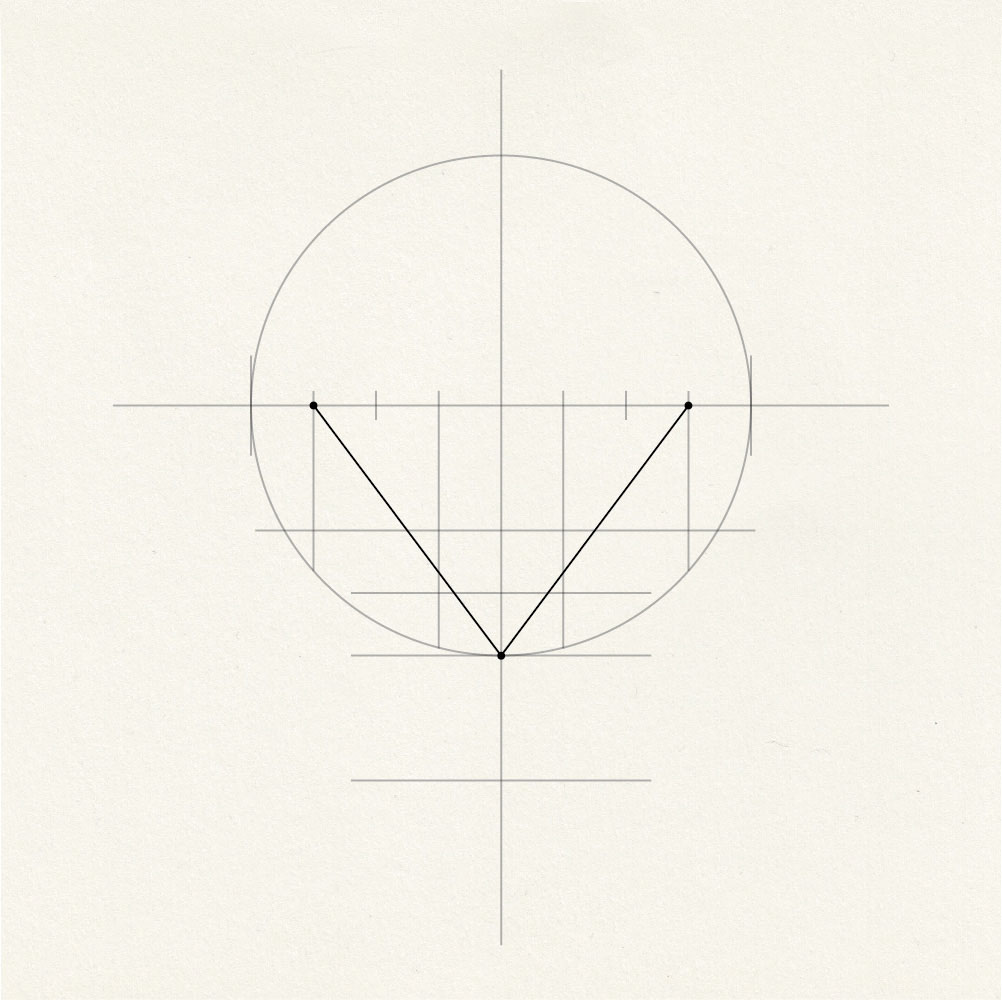
Drawing Guidelines for the Head
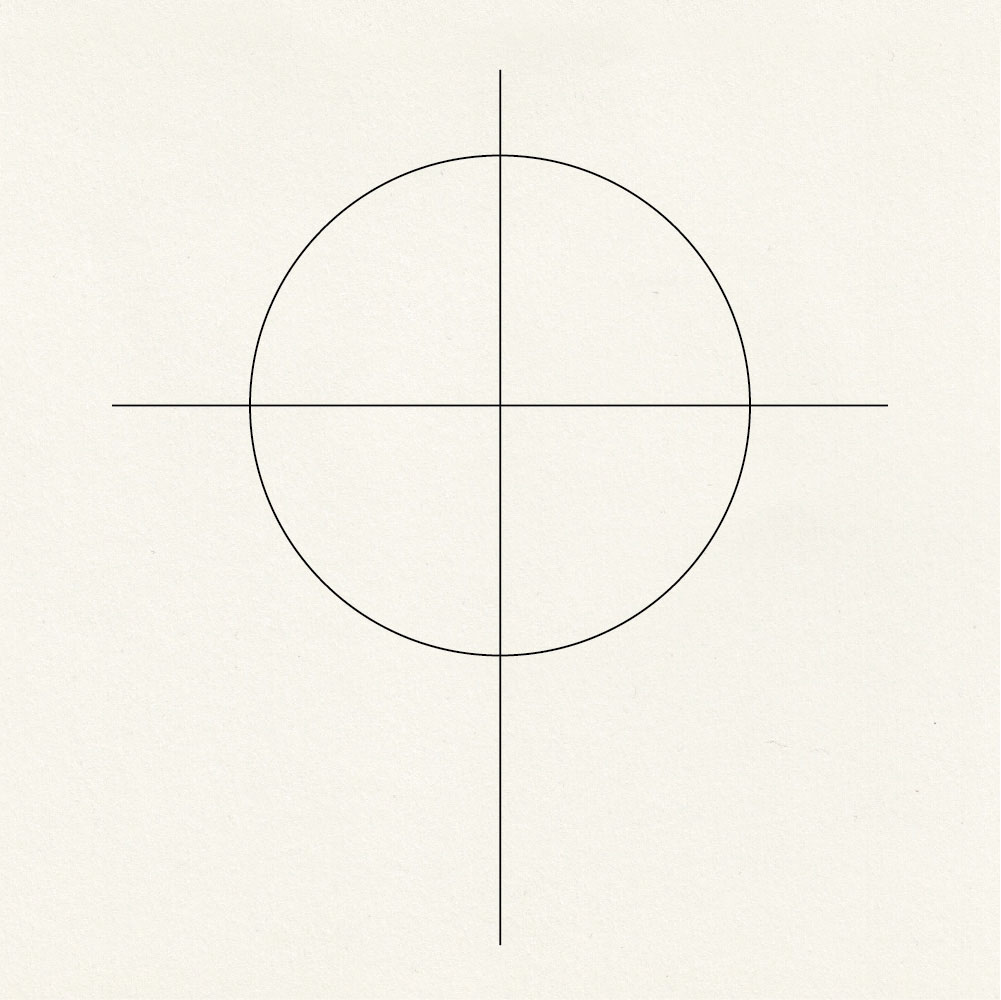
- Draw a circle
- Add a horizontal line to the center of the circle
- Add a vertical line to the center of the circle, but draw it slightly longer on the lower end
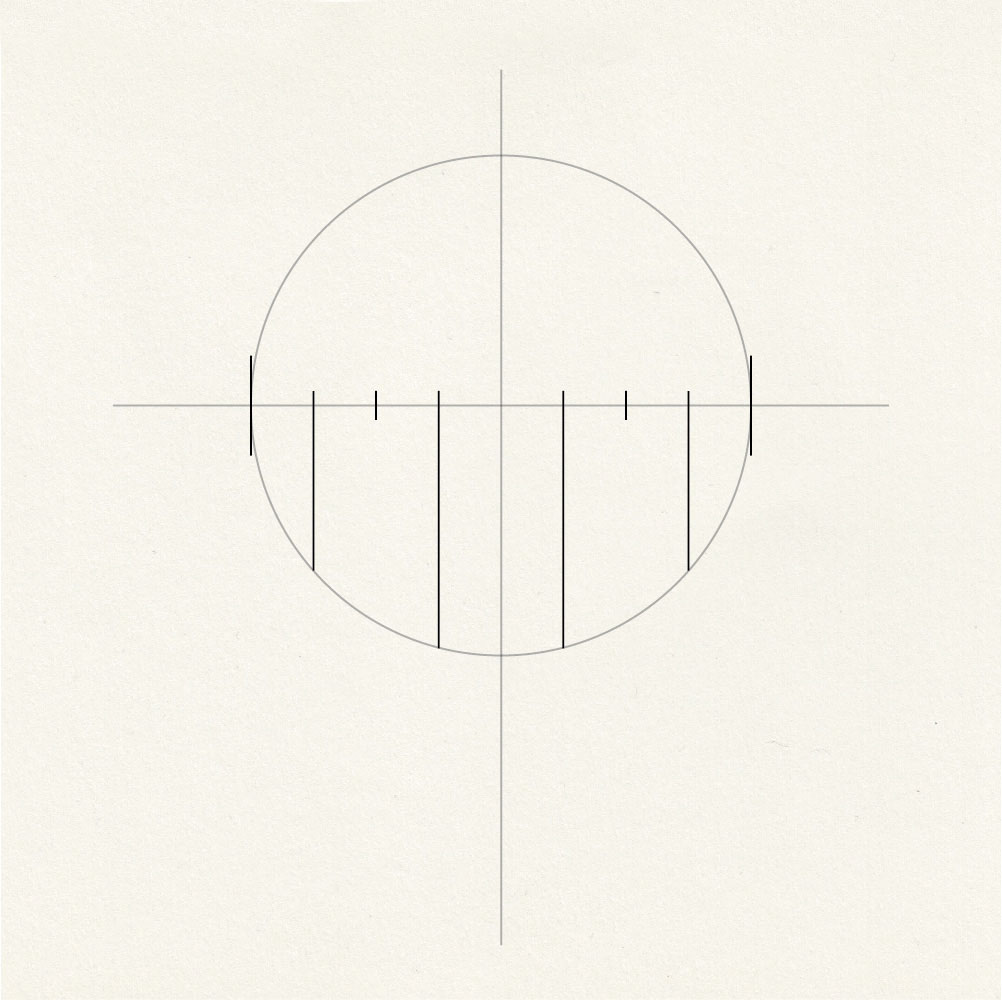
- Draw 8 equally spaced vertical lines
- Draw 4 of them longer just like in the example drawing (you will need them in later steps)
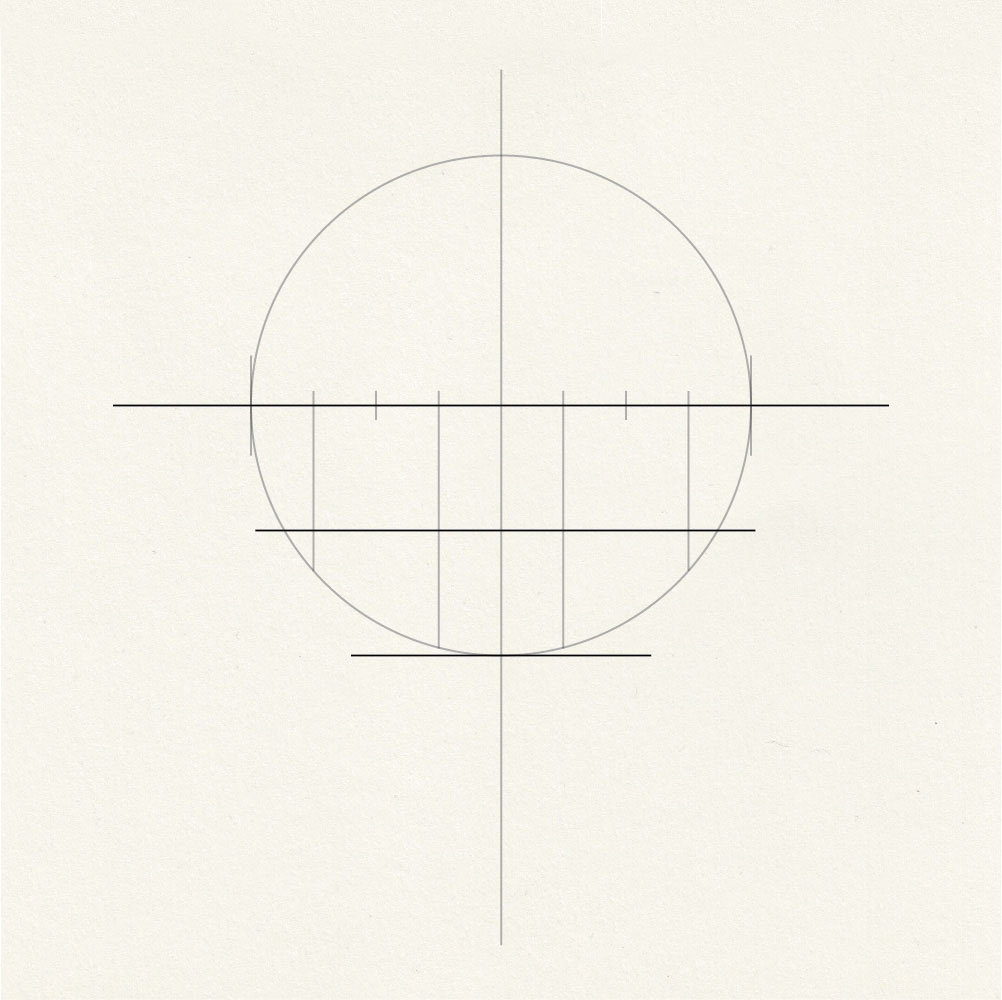
- Add 2 more horizontal lines:
- One line crosses the lower edge of the circle
- One line is right between the central horizontal line and the one you just drew
- Add another horizontal line below the lowest line with equal spacing

- Add a last horizontal line just as shown in the example
- This line needs to be in the middle between the other two and will help you draw the nose in a later step

- Draw 2 diagonal lines as shown in the example
- Connect the 2nd outer points on the middle horizontal line with the central point on the lower end of the circle
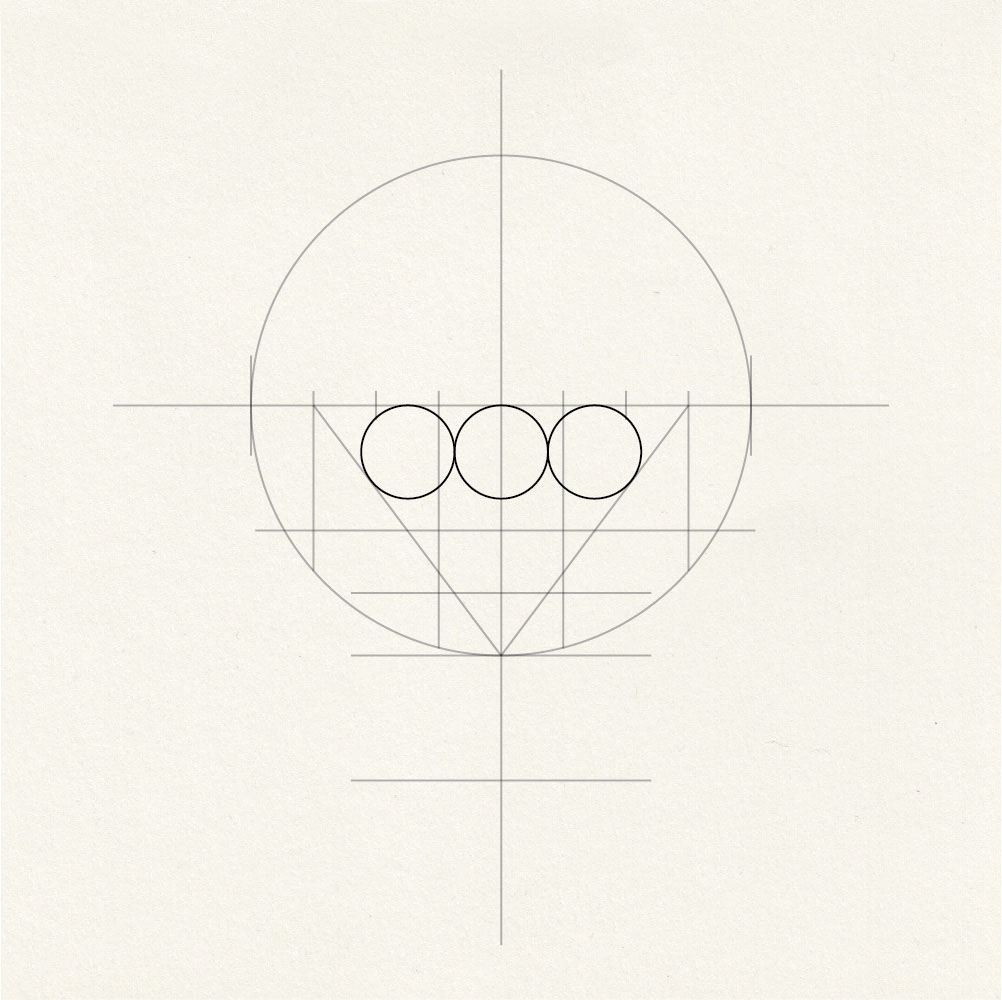
- Draw 3 circles of equal size, as they will help you draw the eyes
- These 3 circles are located below the horizontal line in the center of the circle.
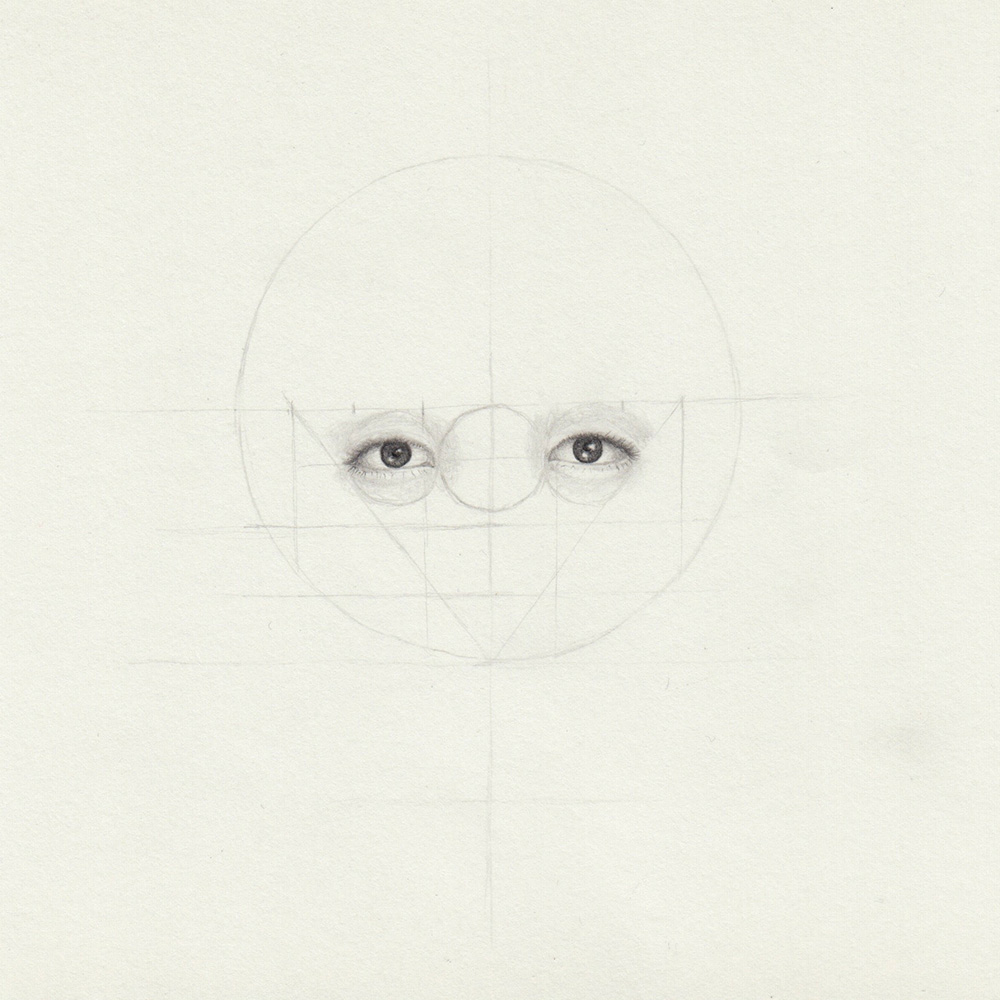
Draw Eyes to the Head
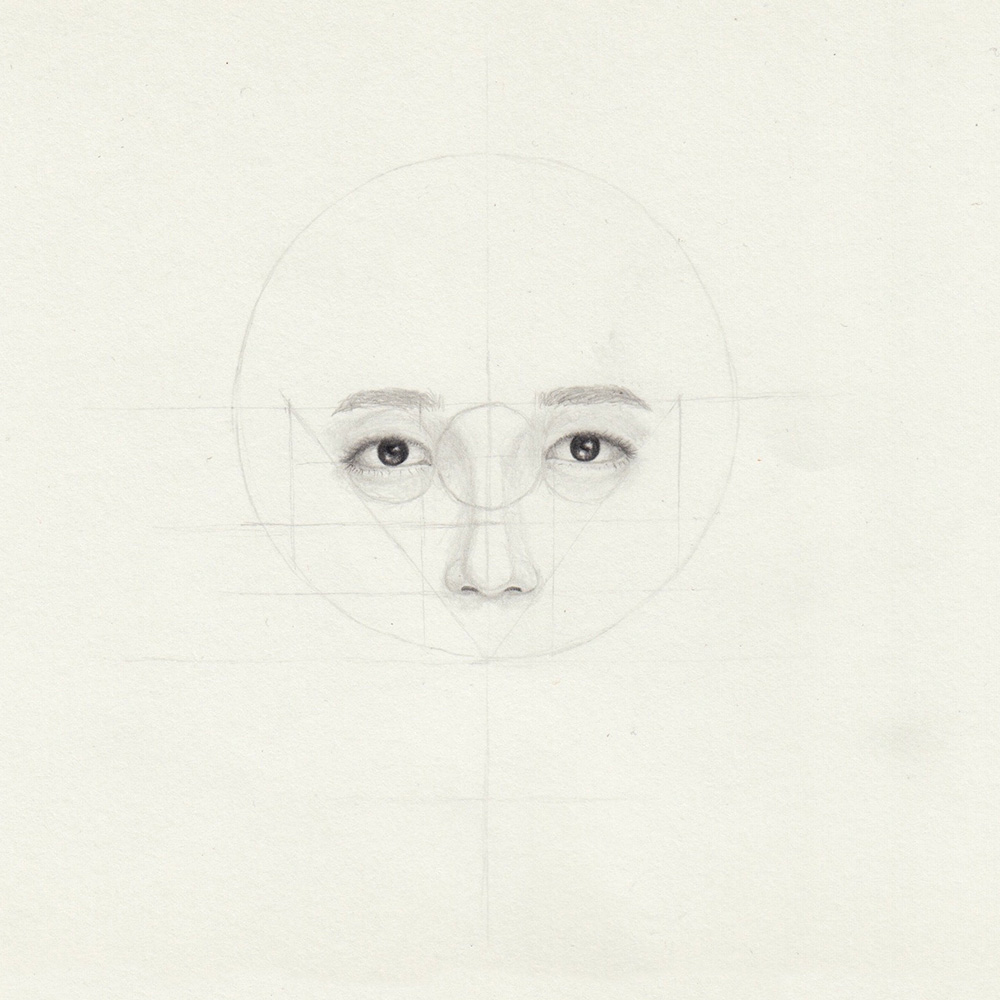
To draw the eyes, it is best to start with the corners. These should touch the edge of the circle, but make sure to not draw them outside of the circles.
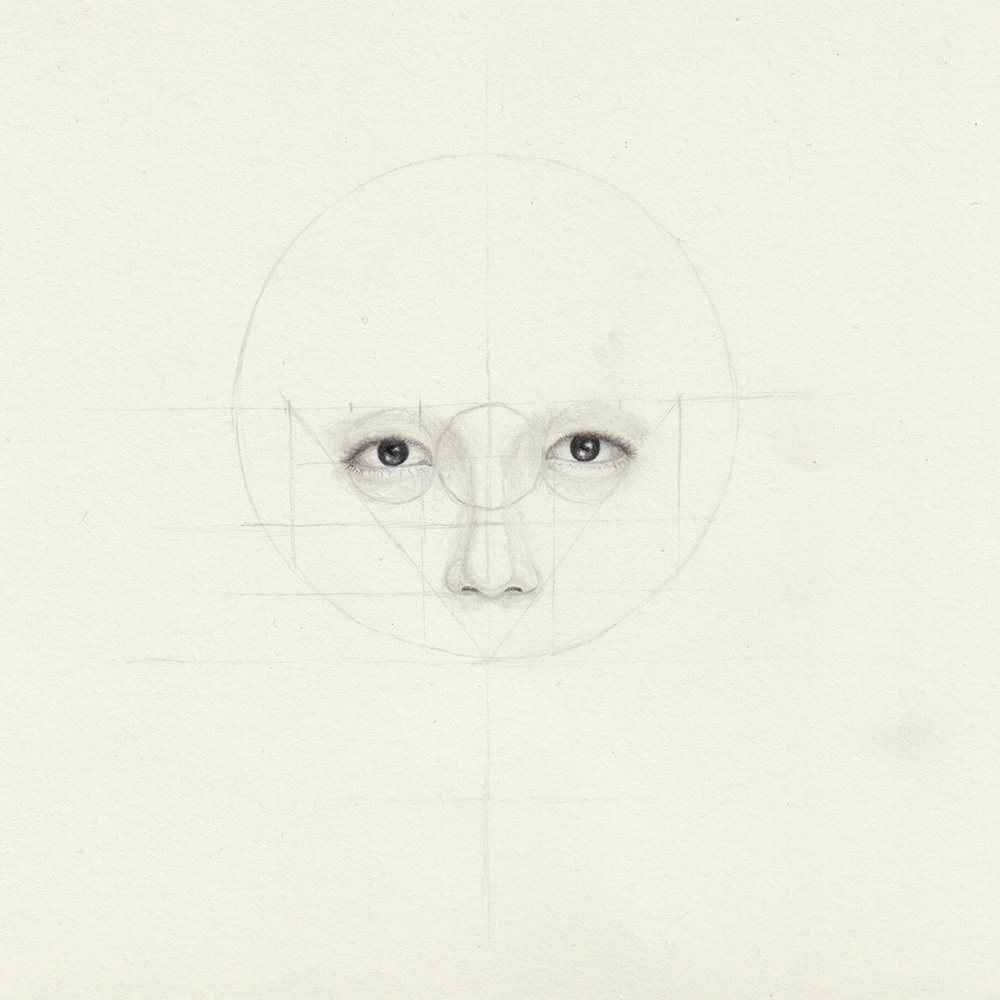
Draw a Nose to the Head
Draw the nose so that it does not go below the horizontal line above that line which intersects the lower edge of the circle.
Different faces have different noses. If you want to draw a wide or narrow nose, you should use the inner corners of the eyes for orientation.
For a wide nose, the nostrils would be further apart than the inner corners of the eyes. For a narrow nose, the nostrils would be closer together than the inner corners of the eyes.
Draw Eyebrows to the Head
Eyebrows influence the appearance of a face enormously. Because of the variety of eyebrows, there is no one way to draw eyebrows. Therefore, I would like to give only a few general tips at this point.
For the height of the eyebrows, you can orientate yourself by the horizontal line that sits in the center of the circle.
Whether the eyebrows are above, below, or exactly on the horizontal line is up to you. Just don’t draw them too high up.
Draw a Mouth to the Head
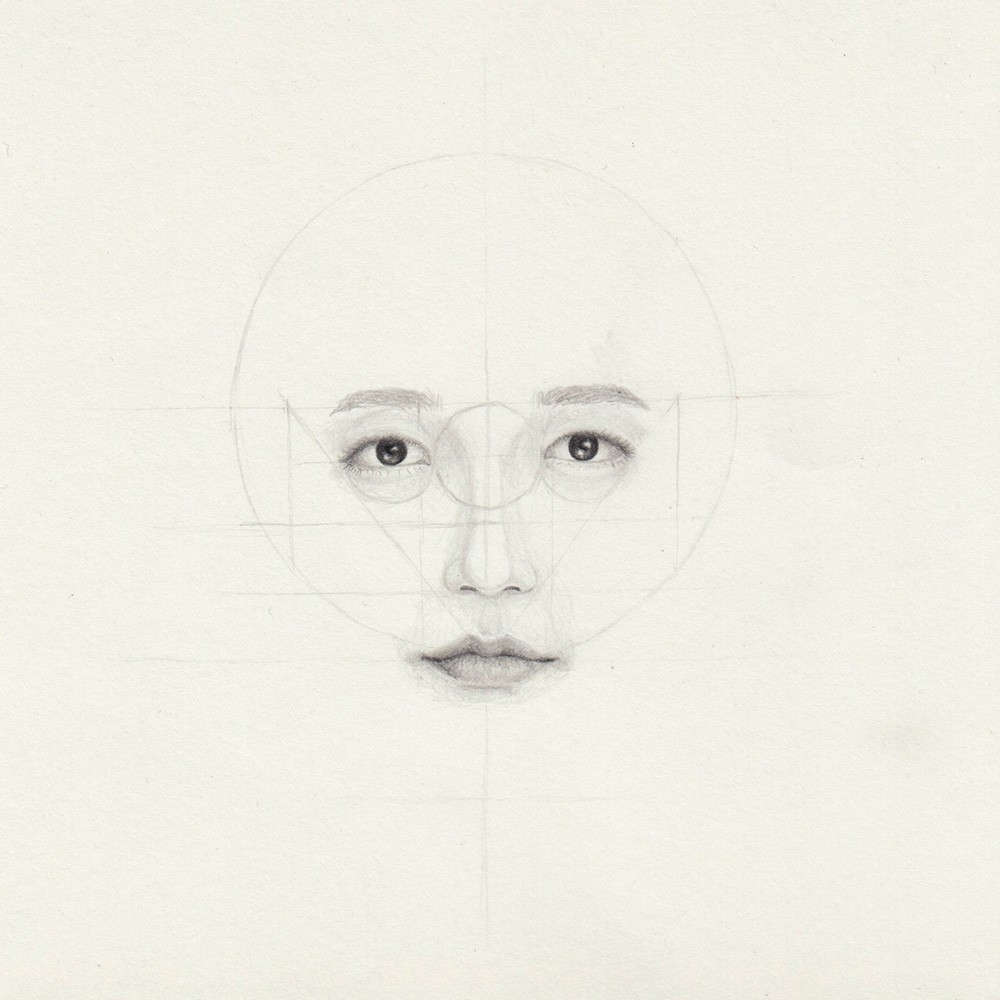
The lower tip of the triangle comes in handy when drawing the lips: Above the tip you can draw the upper lip, below the tip the lower lip.
To draw a cupid’s bow, use the two diagonal lines to find the perfect spot for placing the two arcs.
For the position of the corners of the mouth, you can use the two inner vertical lines that you drew at the beginning: For wide lips, the corners of the mouth should exceed them, for narrow lips, they should be slightly closer to them.
Draw Cheeks to the Head
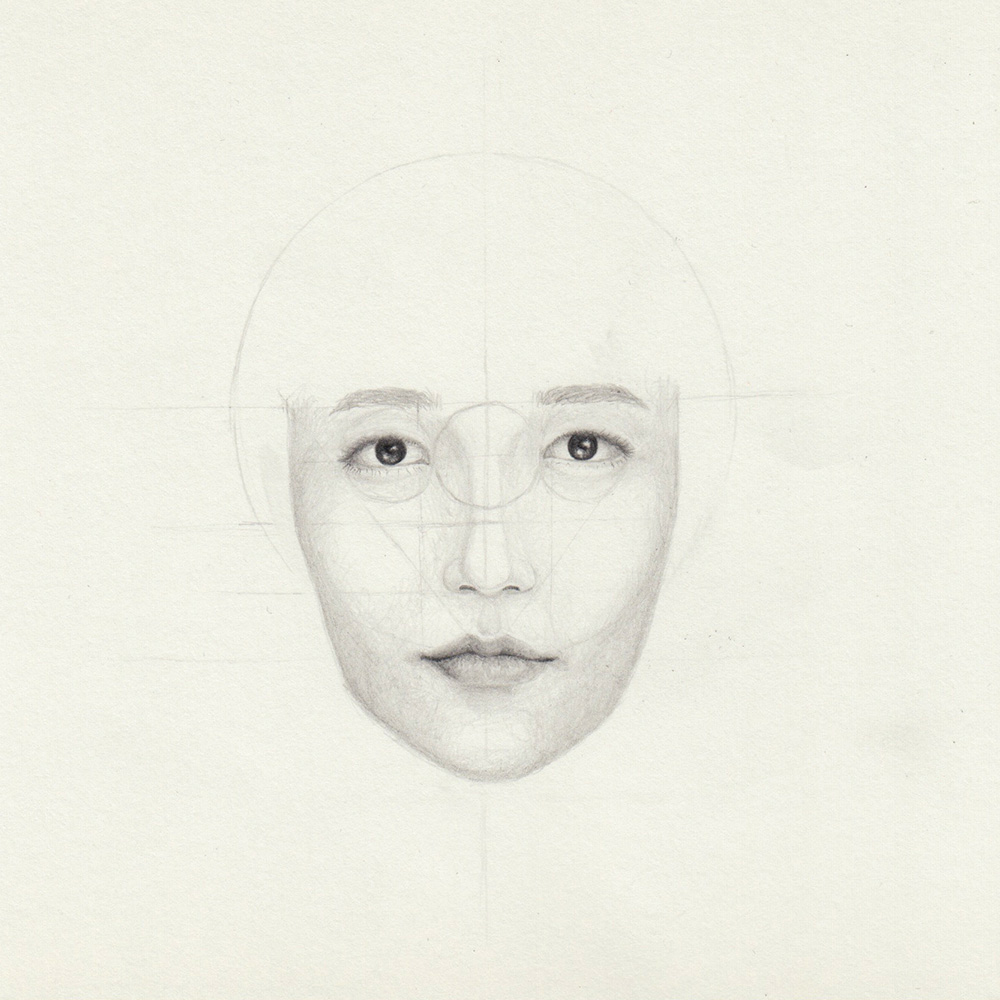
To draw the cheeks, use two elements of your guidelines: The bottom of the circle and the two vertical lines that are near the edge of the circle.
Start drawing the cheeks on the vertical line next to the eyes and lead them close to the lower edge of the circle. For round cheeks, draw them in a round shape. For sharp cheeks, draw them in a slightly steeper shape.
The shadows of the cheeks should fade with the shadows around the mouth. Further gentle shadows should also extend up to the nose and lower eyelid.

Draw the Lower Jaw and Chin to the Head
The lowest guideline marks the area where the chin could be. If you want to draw a small chin, you can draw it a little higher up.
Make sure to draw the lower jaw more narrow than the cheeks.
Feel free to add a few more shadows to the sides of the jaw. But don’t draw them too dark, as your drawing could then look like having a beard.
The chin, on the other hand, can be given soft shadows and a spot of light because it is slightly protruding.
Draw the Forehead to the Head
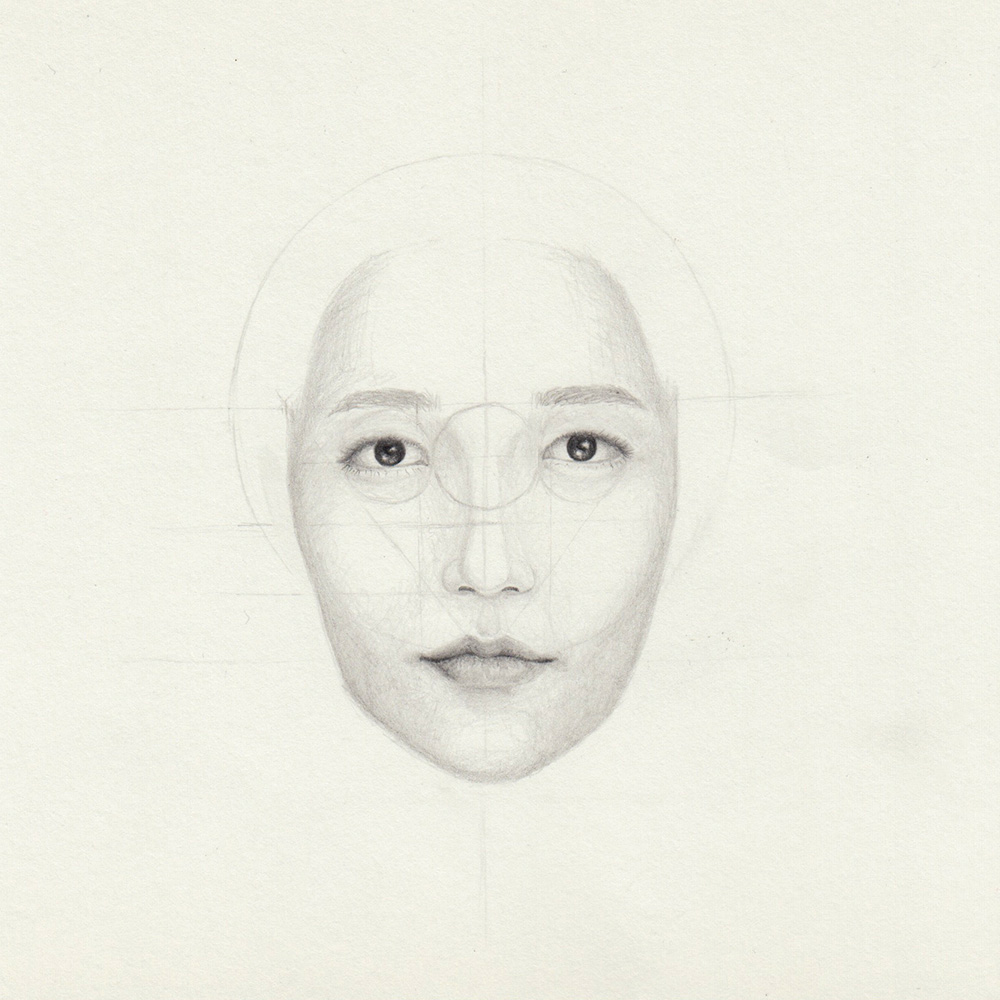
To draw the forehead, it is best to start next to the eyebrows at the temples. From there, work your way inwards and upwards with a shadow, with the shadow becoming softer as it approaches the center.
It is usually easier to draw the hair first and then to work on the forehead. In this tutorial, we will not draw hair. However, to avoid drawing the forehead to an infinite size, we’ll end it where the hairline would be.
Draw Ears to the Head
The position of the ears can be identified by two points of reference: They should begin at the height of the tip of the nose and end at the height of the eyebrows. You should actually be able to see two of the guidelines still and can draw the ears in between.
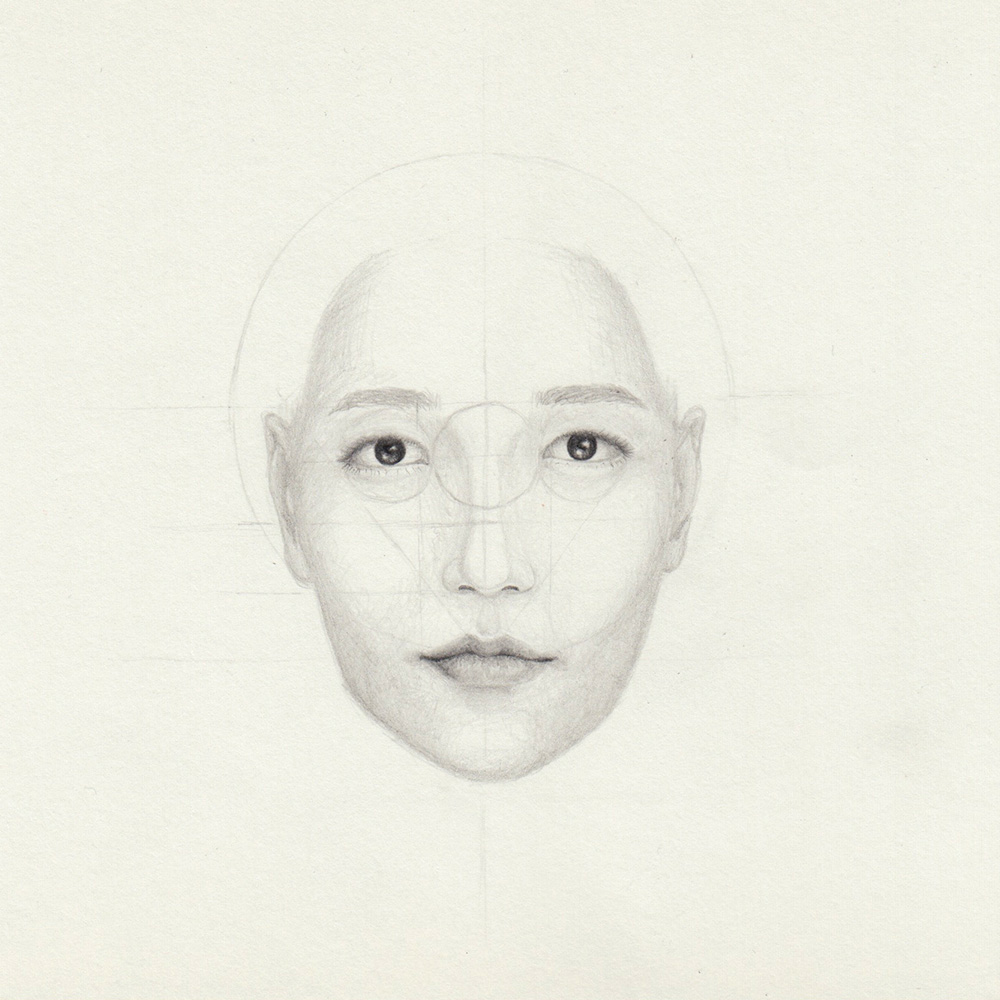
Final Touches on Drawing a Head
Start drawing more shadows behind the ears and lead the pencil in a gentle arc to the upper edge of the circle or the top of the head.
At the side, especially in the area of the ears, the head may be shaded a little darker. Towards the top, however, the shadows should become slightly lighter again.
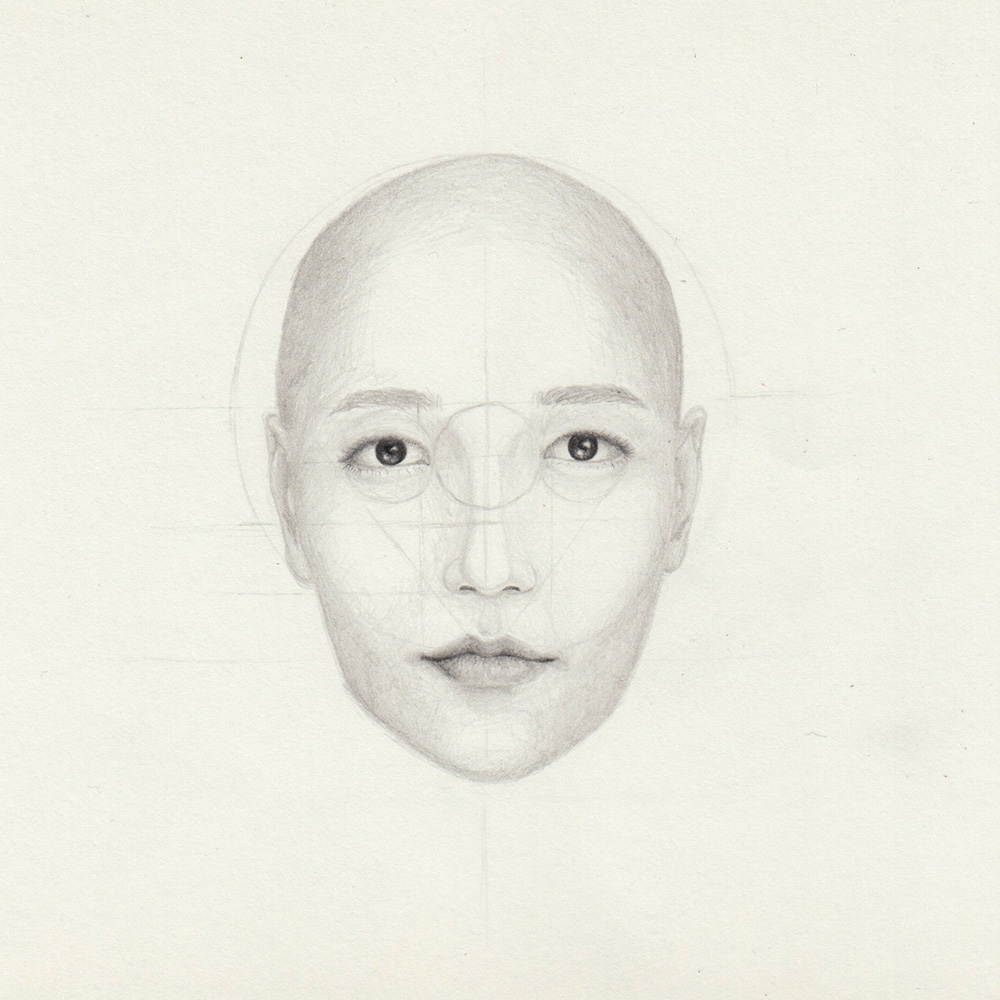
Last Tips fro your Head Drawing
Whether you’re a novice or master artist, there is always room to improve. The guidelines serve as another tool in our arsenal that can be used when drawing heads. After a little practice, it will be much easier for you to draw heads with or without references, as you will develop a sense of proportion.
Guidelines are not an absolutely strict system of rules you have to follow perfectly. They allow for small deviations that lead to different results and can sometimes produce something better than what was originally planned! We all have different-looking heads after all.
By the way: If you manage to draw the face symmetrically, you will automatically find it beautiful. Science has shown time and time again that people equate symmetry with beauty. In conclusion, if you can draw symmetrical faces, you can also draw beautiful faces.
Similar Posts